Play Rogue as a Vanguard with an Exit Plan
Rogue is a Vanguard. Her job is to contest close space, disrupt a target and stay connected to the team long enough to do it again. Punches, defensive energy and separate movement cooldowns work together; spending every approach tool on the first target leaves little flexibility when the fight moves.
Her official hero profile lists 350 Health plus 275 Regenerative Shield. The underlying kit and selected Team-Up effects have different stat rows. In particular, Explosive Entanglement changes Defensive Stance and Southern Brawl, so the ordinary reference numbers below are only part of that branch.
Start each engagement by identifying the space you want to hold, the teammate who can support you there, and the route back. Keep a suitable movement option available rather than treating all four movement abilities as a shared pool of interchangeable charges.
Know the Inputs Before Linking Abilities
These are the listed PC default inputs. On another control layout, use the corresponding bound action. Cooldowns belong to the individual abilities; Southern Brawl also requires Defensive Stance, and Ability Absorption can temporarily become a different action after a successful absorption.
| Action | Input and cooldown | Listed reach | What to plan around |
|---|---|---|---|
| Power Surge Punch | Primary fire | 4.5 meters | A three-hit sequence: 35, 35 and 45 damage. |
| Defensive Stance → Southern Brawl | Hold secondary fire; press primary fire during stance. Brawl: 6 seconds. | Brawl dash: 8 meters | Defensive energy and stored backlash; selected effects can strengthen this interaction. |
| Fatal Attraction | Shift, then press again for the field; 12 seconds. | 10-meter dash; field expands to an 8-meter radius. | The dash distance and field radius are different measurements. |
| Chrono Kick Combo | E, then activate again for the knockdown; 10 seconds. | Next two ranged attacks travel up to 20 meters. | Up to three seconds of flight between stages. |
| Ability Absorption | F; 25 seconds. | 10-meter dash | Knock down and absorb a target; receive an ability or refresh Fatal Attraction. |
| Heartbreaker | Q; eight-second duration. | 8-meter radius | Nearby enemy roles determine which capped benefits you can gain. |
Keep punches in the rotation. Connecting all three ordinary strikes totals 115 damage before other effects and mitigation. That is a reason to stay in useful melee range between ability inputs, rather than spending every cooldown and immediately losing contact. It is not a promise that every target takes the same final damage.
Defensive Stance: Spend Energy, Bank Backlash, Then Brawl
The ordinary Defensive Stance reduces incoming damage by 60% and absorbs nearby projectiles. Its energy pool is 100, it requires 30 to activate, consumes 60 per second while active and recovers 25 per second while inactive. Use it for a deliberate defensive window rather than trying to hold it throughout an engagement.
Damage reduced by stance feeds backlash energy at the listed 0.55 conversion ratio. Stored backlash caps at 100 and has a listed falloff of 20 per second. Holding stance without absorbing damage does not create a fully charged attack, and banked backlash is not something to save indefinitely.
To use Southern Brawl, press primary fire while still in Defensive Stance. Releasing stance is not the attack input. The ordinary Brawl has an 8-meter dash, 40 base damage, a six-second cooldown and a launch effect on enemies hit.
The ordinary tooltip converts backlash into extra damage at 0.75. With 100 stored backlash, that is up to 75 bonus damage, or 115 base-plus-backlash damage before other effects. The July 10 balance update reduced this maximum bonus from 90 to 75; older 130-damage descriptions use the earlier value.
- Reach useful range. Use cover and an approach angle that leaves a way back to your team.
- Take the defensive window you need. Stance can reduce pressure while feeding backlash; watch the available energy.
- Press the Brawl attack during stance. Aim to connect with the target you want to displace, then continue with punches or reposition.
- Reassess the fight. A successful launch does not require spending every remaining movement cooldown.
Apply the selected-effect rules next. The ordinary 60% reduction and 115-damage calculation do not fully describe Explosive Entanglement’s fortified stance.
Choose Your Team-Up Effect
The current official Team-Up directory shows two Rogue selections. Each separates its Base Effect from an Enhanced Effect with the named partner. Check the selection you are using before copying a stance or damage value into your plan.
| Selection | Base Effect | Partner enhancement |
|---|---|---|
| Mr. & Mrs. X | Activate with C: for eight seconds, attacks trigger kinetic explosions that damage nearby enemies and heal nearby allies. Listed cooldown: 30 seconds; radius: 8 meters. Each explosion lists 5 + 1% of the target’s maximum Health as damage and 15 healing. | With Gambit, Rogue permanently maintains the Hearts as One state. |
| Explosive Entanglement | Fortifies Defensive Stance with a magnetic field. The selected stance lists 75% damage reduction, and absorbed damage converts directly into Southern Brawl damage. | With Magneto, Southern Brawl knocks enemies back and adds 60 damage if they collide with a wall. |
Mr. & Mrs. X supports an attack-and-support loop: stay close enough for the explosions to affect the fight and nearby teammates. Its activation window matters in the base version; Gambit’s enhancement changes that timing by maintaining the state.
Explosive Entanglement changes your defensive counterattack. Use its fortified-stance rules rather than treating the ordinary backlash calculation as its complete damage formula. With Magneto’s enhancement, a wall becomes part of the positioning decision: an available collision can add damage, while a knockback into open space may move the opponent away from follow-up punches.
Fatal Attraction: Separate the Approach from the Field
Fatal Attraction first dashes 10 meters and deals 30 damage on contact, launching enemies hit. Press the action again to create its damaging field. The field expands to an 8-meter radius after 0.8 seconds, deals 40 damage per second, and retracts for 30 damage while pulling enemies toward Rogue. Its cooldown is 12 seconds.
The field is a cylinder with a listed 3-meter height. A target being reachable by the dash does not establish that it remains inside the field, and the radius is not unlimited vertical coverage against a flying opponent.
Use the dash to take a useful position, then time the field around enemies who are actually within its area. If the opponent is already leaving the fight, consider whether spending the field and your next movement tool will leave you too far from healing or cover. Plan the follow-up around the target’s actual position and time inside the field.
Chrono Kick Combo: Launch, Flight, Knockdown and Ranged Attacks
Chrono Kick Combo begins with a forward movement and launch for 30 damage. Rogue enters flight for up to three seconds and can activate the ability again to knock down nearby enemies. The knockdown lists 30 damage in a 6-meter-radius area.
The next two Power Surge Punch attacks become ranged projectiles that pierce enemies. Each lists 60 damage and a maximum travel distance of 20 meters. The ability also grants Bonus Health. Its cooldown is 10 seconds.
This gives you a way to continue applying pressure when a target is outside ordinary punch range. Aim those two ranged attacks deliberately. The 20-meter projectile reach does not mean every other stage of the ability hits at 20 meters.
The flight window is also a positioning decision. Identify where you will land and who can support you there before committing to the knockdown. Landing beside several opponents while the rest of your movement tools are unavailable can turn a successful launch into a poor trade.
Practice the Fatal Attraction and Chrono Kick Sequence in Parts
The informal “Shifty Shift” sequence combines Fatal Attraction’s approach and field with Chrono Kick’s launch and knockdown. Treat it as an input-and-positioning exercise rather than a guaranteed damage number.
- Learn Fatal Attraction on its own: dash into a suitable position, use the second input and observe where the field reaches.
- Learn Chrono Kick on its own: launch, use the short flight window, finish the knockdown and aim the two ranged attacks.
- Link the tools around a target that remains in reach. Work toward overlapping the field’s pressure with the launch and knockdown, while keeping your landing position inside a useful team angle.
- Add punches when you are in melee range. Continue the fight only while the position remains favorable; use the movement you saved to leave or peel when it changes.
Opponent movement, field contact, defensive effects, your selected Team-Up and missed attacks all affect the result. Control the sequence, judge whether the target remains in reach, and retain a useful next action.
Ability Absorption: Pick the Role Benefit You Need
Ability Absorption dashes up to 10 meters, knocks down the target and begins a 0.75-second absorption process. Rogue is Unstoppable during the absorption. The listed rates during that process are 30 damage per second and 60 healing per second.
After absorption, the action becomes one of the target’s abilities or refreshes Fatal Attraction. The absorbed ability’s listed duration is 10 seconds, and Ability Absorption’s cooldown is 25 seconds. Check which action you received before planning the next input.
| Target role | Benefit to Rogue | Debuff to the target |
|---|---|---|
| Vanguard | 150 maximum Health | 20 less maximum Health |
| Duelist | 20% damage boost | 3% less damage dealt |
| Strategist | 20 Health per second of self-healing | 4% less healing dealt |
The Vanguard benefit is 150 maximum Health. The September 11 balance update increased it from the older 125 value.
Choose for the fight you have: a reachable Vanguard can offer a larger Health pool, a Duelist offers an offensive boost, and a Strategist offers self-healing while reducing that target’s healing output. The target’s position matters alongside its role. A distant healer behind the enemy team may be a worse immediate choice than a diver threatening your own support.
Use the knockdown to create an opportunity for teammates to follow up. The Unstoppable window belongs to the absorption process; do not build the approach around a promise that one cast automatically cancels a particular enemy ultimate. Likewise, plan around the action you actually receive rather than assuming every target supplies any ability you want.
Heartbreaker: Stay in Range and Respect the Caps
Heartbreaker lasts eight seconds in an 8-meter radius. It deals 15 damage per second and absorbs enemy ultimate energy at the listed rate of 4% per second. Rogue also steals stats according to the nearby enemies’ roles.
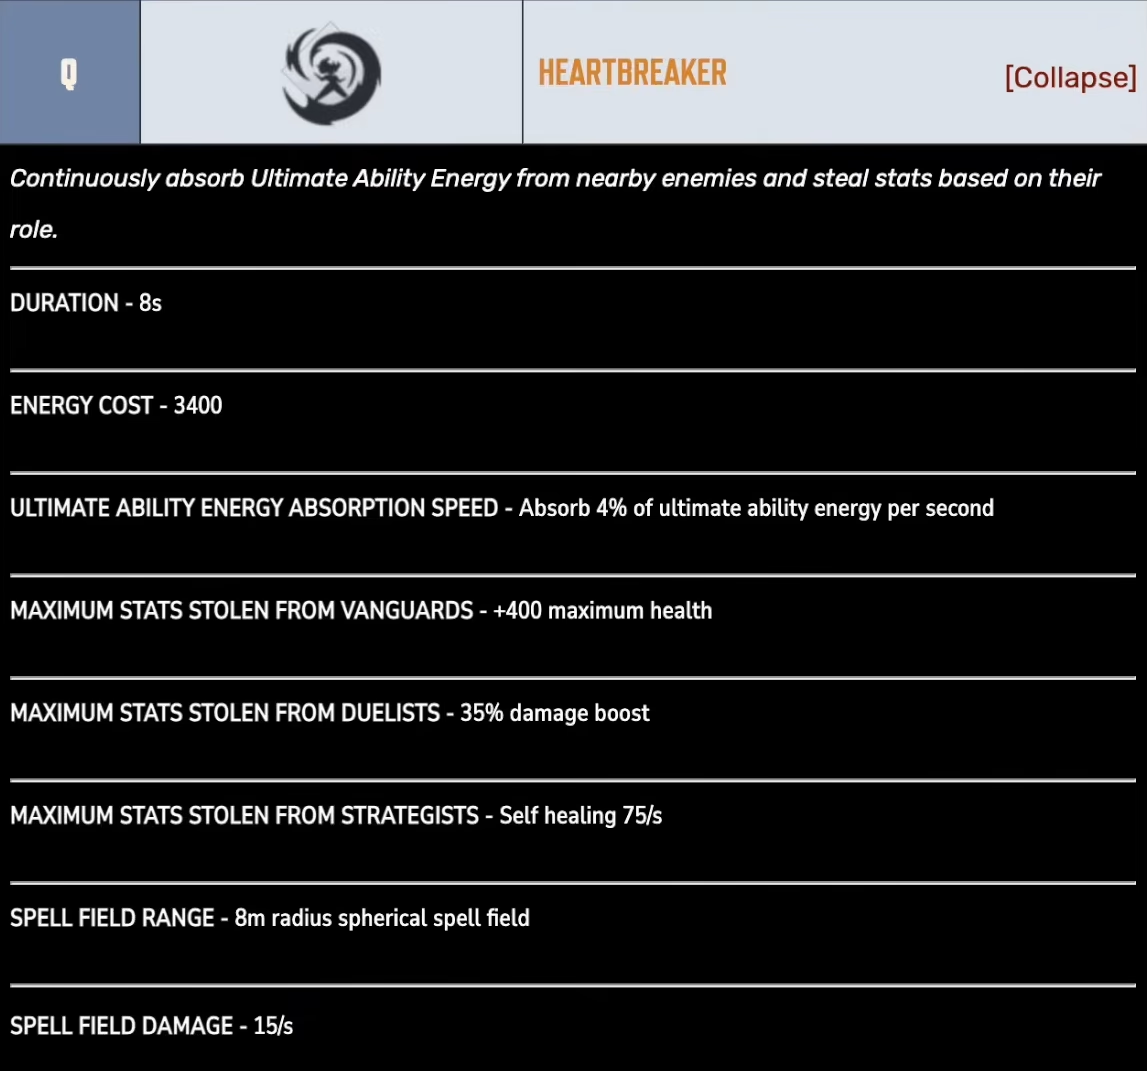
- Vanguards: up to 400 maximum Health.
- Duelists: up to a 35% damage boost.
- Strategists: up to 75 Health per second of self-healing.
The Strategist figure is a maximum, not an additional 75 Health per second for every healer. Being near several enemies does not remove these caps, and an enemy leaving the field changes what you can extract from that position.
Look for a brawl where you can stay close to relevant targets with teammates supporting you. Keep an exit available for the end of the window. Activating far from opponents will not provide the same role benefits, while charging into the whole enemy team without support can still leave you overwhelmed.
Decide Whether to Chase, Peel or Reset
Chase when the target is reachable and you can keep a route back. A low-health opponent is not enough reason to use every movement action to cross the map. Ordinary punches reach 4.5 meters; use the right tool for the actual gap.
Peel when an enemy threatens the teammates keeping your frontline stable. Returning to your supports and using a launch, pull or absorption knockdown can be more useful than continuing a distant duel. Control the attacker to give your teammate room to move.
Reset when the fight has moved beyond your support or your defensive resources are depleted. Regenerative Shields begin recharging after five seconds without taking damage, then recover their chargeable pool over the next five seconds, as described in the July 10 shield rules. A brief damage-free reposition can therefore matter alongside incoming healing.
When enemy control makes the approach difficult, use cover and a teammate’s pressure to reach a better angle. Keep track of the absorption window and your next available movement action instead of treating Defensive Stance as protection from every possible effect.
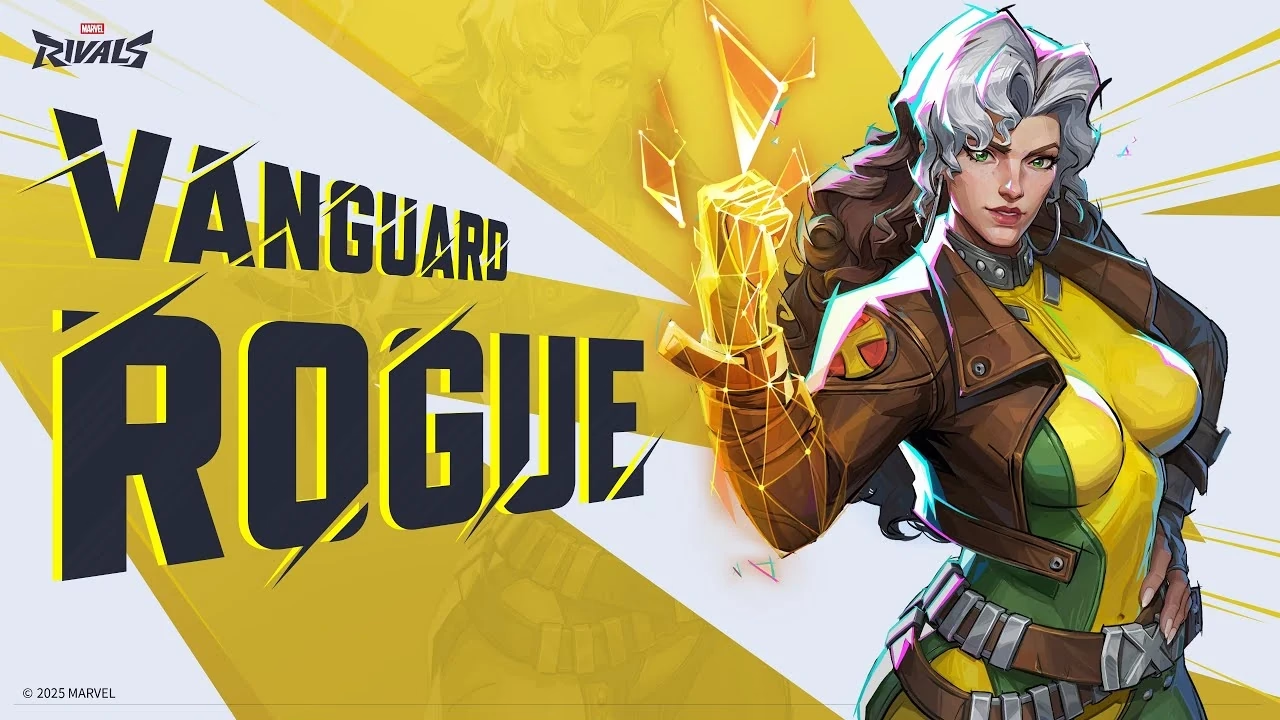
Cover artwork: Marvel Rivals’ official Rogue character reveal.
Rogue FAQ
Is Rogue better for burst or sustained damage?
Build around punches and repeated control windows. Her abilities can concentrate damage, but their value depends on contact, positioning and the selected Team-Up effect. A fixed combo total is a poor basis for deciding whether to commit.
What is the most important resource to manage?
Manage stance energy and individual movement cooldowns together. They are not one shared set of dash charges. Keep a suitable next action for disengaging, following a target or returning to your supports.
How does Southern Brawl work?
Press primary fire while holding Defensive Stance. The ordinary version dashes 8 meters, deals 40 base damage and converts stored backlash into up to 75 additional damage, with a six-second cooldown. Explosive Entanglement fortifies stance and changes the conversion interaction.
What is the Shifty Shift combo?
It is an informal sequence linking Fatal Attraction’s approach and field with Chrono Kick’s launch and knockdown. Practice each part, then connect them around a target that remains in range. The name describes a practice sequence rather than a separate ability.
Which heroes should Rogue target with Ability Absorption?
Choose a reachable target for the role benefit and follow-up your team needs: Vanguard for maximum Health, Duelist for damage, Strategist for self-healing and a healing-output debuff. Check the resulting action rather than assuming a specific stolen spell.
Does Rogue need healer support?
Rogue is a Vanguard whose close-range engagements benefit from reliable team support. Keep a healing angle open and return to protect your supports when they are pressured. Her situational self-healing and Regenerative Shield do not remove those positioning decisions.
When should I use Heartbreaker?
Use its eight-second window where you can stay within 8 meters of useful enemy roles while your team follows up. Its listed caps are 400 maximum Health, 35% damage boost and 75 self-healing per second. Plan where to go when the window ends.
What makes a matchup difficult for Rogue?
Spacing that prevents close contact, control that disrupts an approach, and pressure that separates her from support all make the fight harder. Respond with cover, a better angle and saved movement rather than assuming stance or absorption guarantees a specific ultimate counter.