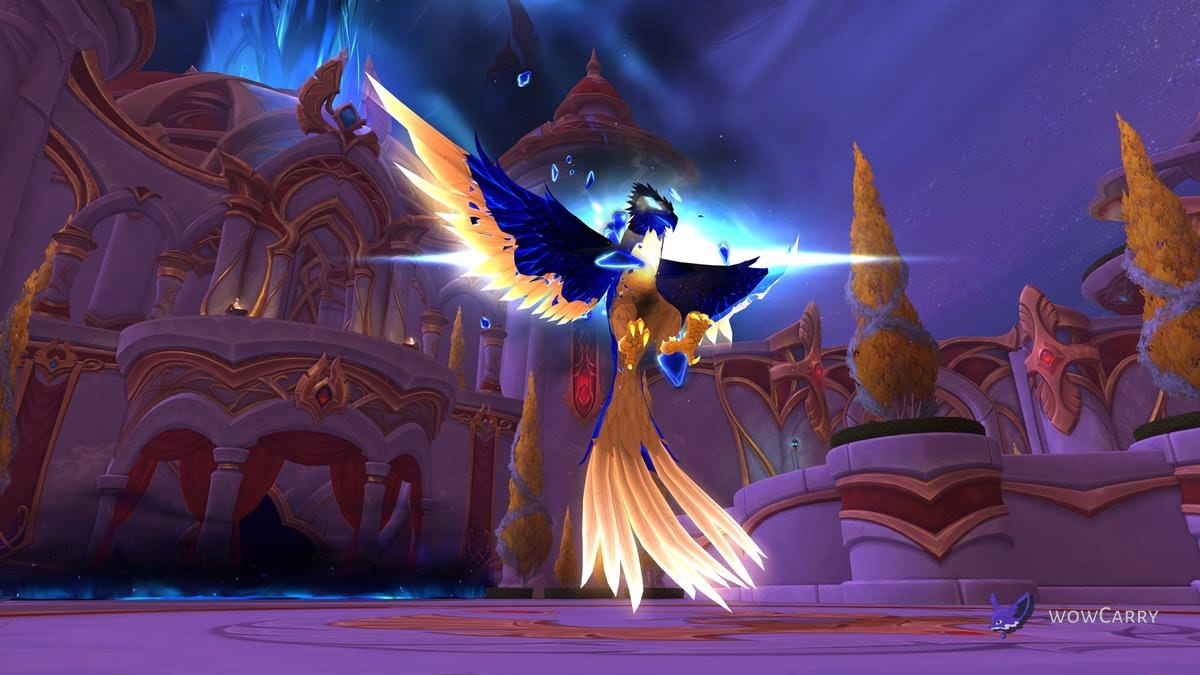
Belo'ren, Child of Al'ar: The Opening Mythic Test of March on Quel'Danas
Belo'ren is the first of two bosses in March on Quel'Danas, the single-wing Midnight Season 1 raid that closes with Midnight Falls. Liquid burned 196 pulls clearing him on Mythic during the world-first race in April. He punishes mistuned polarity calls more than any boss in the wing, and most pug walls are pure ad/orb chaos rather than tuning. This walkthrough rebuilds the strat around what actually kills pulls in the current tier: Voidlight Convergence assignments, Radiant Echoes orb soaks, the 15-second egg window, and the Light/Void Feather polarity system that gates every other mechanic.
Key Takeaways
- First boss, not second-to-last. March on Quel'Danas has two bosses total. Belo'ren opens the wing; Midnight Falls closes it.
- Mythic Belo'ren drops Hero-track loot and is the source of the Ashes of Belo'ren mount. The tier set token only drops from Midnight Falls.
- Polarity is the entire fight. Every player gets a Light Feather or Void Feather. Matching color cuts same-color damage by 50%. Stand opposite, you die.
- Radiant Echoes orbs sort by color. Soakers take matching color; tanks rotate based on the opening orb spawn direction. Wall-source vs entrance-source determines the whole pattern.
- Phoenix adds need matching-color interrupts. Only Light-Feather players can interrupt a Light Ember Phoenix lethal cast. Same for Void.
- Egg phase = 15s burst window. Phoenix dies, drops an egg. Kill the egg in 15s or the phoenix respawns. Bloodlust here, not in Phase 1.
- Ashen Benediction is the soft enrage. Stacks on the raid through Phase 2; 6-minute hard enrage. Two egg kills before berserk is the kill plan.
With those seven beats in mind, the next sections work through the tuning shifts, comp shape, and assignments your raid needs before the first Mythic pull.
Mythic Tuning Changes That Matter
Mythic adds two changes that flip the encounter's difficulty curve from Heroic. Radiant Echoes orbs now wipe-tier on contact with the boss or the Phase 2 egg, so an unsoaked stray orb ends the pull instead of just chunking the raid. The fight also escalates faster. Dual phoenix spawns hit immediately on Mythic, and the orb count rises through Phase 2 with patterns that don't appear on Heroic at all.
The other Mythic-specific wrinkle is orb-pattern locking. The first orb set's spawn direction (side walls versus the entrance/exit axis) determines every subsequent pattern in the encounter. Your raid leader needs to call the direction on the opening set, and a designated player should drop raid markers immediately so swap calls aren't guesswork later in the pull.
Raid Composition for a Mythic Pull
Standard Mythic comp is 2 tanks, 3 healers, 15 DPS. You can flex to 4 healers if your DPS pool is thin, but the kill plan assumes 3 healers because Ashen Benediction stacks the raid damage profile in a way that scales healer mana faster than throughput. The composition priorities, in order:
- One Death Knight. Not for Death Grip on phoenixes (matching-color interrupts handle those), but for Anti-Magic Zone covering raid pulses and the Unholy/Devourer parity in S-tier DPS.
- Immunity-capable DPS. Stack Hunters (Aspect of the Turtle), Rogues (Cloak of Shadows), Paladins (Divine Shield), and at least one Mage (Ice Block) for orb soak rotation. The polarity system lets immunity players soak the wrong-color orb without dying, which is what makes the fight tractable.
- Cheat-death coverage. Rogues bring Cheating Death. Augmentation Evoker brings Defy Fate with the group-heal rider. Both reduce wipe risk on Phase 2 Ashen Benediction stacks.
- One Guardian Druid in the tank pool. The Wild Guardian talent's Berserk/Incarnation echo aligns with Bloodlust on egg phases for outsized burst contribution.
With the tank and immunity backbone in place, the DPS spec layer is what determines whether a pug clears or wipes on enrage.
DPS Specs That Carry Mythic Belo'ren
S-tier picks for this encounter in the current Midnight tuning:
- Devourer Demon Hunters are the new third DH spec from Midnight; cosmic-damage thresholds scale into Radiant Echoes soaks and add cleave equally well.
- Demonology Warlocks hit top-3 DPS on parses thanks to Tyrant alignment on egg phases, with imps split-cleaving the egg + phoenix corpse for free damage.
- Augmentation Evoker buffs the polarity-locked carry roster and brings Defy Fate as a survival floor.
- Unholy Death Knights keep Festermight stacks through the Phase 2 transition; Army of the Dead aligns with egg windows.
A-tier picks include Elemental Shaman on the three-minute Ascendance build, Boomkin, Windwalker Monk, MM Hunter, and Guardian Druid in a tank-DPS dual role. Avoid specs that rely on long ramps since Belo'ren's egg windows reward burst over sustain.
The Light/Void Feather Polarity System
Polarity is the mechanic that makes or breaks every other call. On pull, every raid member receives either a Light Feather (gold) or Void Feather (purple) debuff. The rule is simple in principle: matching color reduces damage from same-color mechanics by 50%, opposite color takes lethal damage. In practice, four mechanics rely on it:
- Voidlight Convergence assigns alternating raid-wide pulses by color. Wrong-color players need an immunity or a defensive at the cast bar.
- Radiant Echoes orbs come tagged with one color. Soak with matching color, leave the other to immunity players.
- Light/Void Eruption creates puddles in matching-color zones. Stand in your color's safe spot.
- Light/Void Edict dot-bombs the raid; healers triage matching-color targets first since opposite-color targets carry a heavier multiplier.
Tanks always carry opposite feathers from each other so they can split orb cleave duty. If both tanks end up with the same color through a Rebirth quirk, swap immediately with a Misdirect or Tricks rather than push through. A polarity-mismatched tank pair is a hard wipe within 30 seconds.
Radiant Echoes: Orb Soak Mechanics
The orb wall is where most pulls die. Two rules govern soak assignments:
- Color sort. Each Radiant Echoes wave is a mixed batch of Light and Void orbs. Players soak orbs of their matching color. Tanks soak the opposite color since they carry opposite feathers from the raid majority.
- Direction lock. The opening set's spawn axis (side walls vs entrance/exit) determines every subsequent pattern. Side-wall opens lead to corner-set Phase 2 orbs; entrance/exit opens lead to wall-set Phase 2 orbs. Mark the floor with raid markers on the first wave so the second wave call is automatic.
Immunity players are your safety net. A Hunter in Aspect of the Turtle, a Rogue in Cloak of Shadows, or a Paladin under Divine Shield can soak the wrong-color orb without taking the lethal hit. Use them to clear stray orbs that drift toward the boss or egg, since those contacts are the actual wipe condition on Mythic. Cheat-death players (Rogue Cheating Death, Aug Evoker's Defy Fate) act as a second-tier insurance for cleanup soaks.
Tank Cone Management
Tank frontals overlap with orb soaks during Phase 2. The rotation that holds: tank A points the boss into the dead corner, soaks the matching orb wave, then taunts over so tank B can re-position before the next frontal. Death Drop and the Guardian's Edict frontals require the soaker tank to step back to the boss within 4 seconds of finishing a soak, which is why mobile-immunity classes are preferred as backup soakers.
Phoenix Adds and the Egg Phase
Phoenixes spawn in matched pairs: one Light Ember Phoenix, one Void Ember Phoenix. Each casts a lethal channel that only matching-color players can interrupt. Assign two interrupters per color, one primary and one backup, parking them at staggered positions so a single fire on the floor doesn't take both out.
Killing a phoenix drops an egg. The egg has a 15-second window before the phoenix respawns at full HP, which means every cooldown the raid can stack goes here:
- Bloodlust/Heroism on the first egg phase to lock in the kill before Ashen Benediction stacks bite.
- On-use trinkets queued during the phoenix's last 10% HP so they're up the moment the egg drops.
- Boss DR cooldowns (Aug Evoker, Devourer DH) target the egg, not the boss.
If you miss the 15-second window, the phoenix respawns and the raid loses ~20% of its overall DPS budget. Three missed egg windows in a row puts you over the 6-minute enrage. The kill plan is two solid egg-phase bursts plus a soft execute on Belo'ren after the second egg.
Ashen Benediction Soft Enrage
Ashen Benediction is a stacking debuff that ticks raid-wide damage throughout Phase 2. It's the soft enrage layer: healer mana goes critical somewhere in the high single digits of stacks unless the raid can push the second egg phase before that point. Wowhead's spell entry confirms the multiplier scales linearly per stack.
The hard enrage hits at 6 minutes. The practical floor for a kill is two solid egg windows landed within the first 4 minutes. If your second egg lands after 4:30, you're racing the enrage with stacking Ashen Benediction; if it lands before 4:00, you have execute window comfort.
Carry-Buyer Note: Belo'ren-Only vs Full 2/2 Clear
Belo'ren doesn't drop the tier set token. That drops from Midnight Falls. So if your tier slot is what you actually need for set bonuses, a Belo'ren-only kill is half a job. If a Mythic Belo'ren pull keeps falling apart on Radiant Echoes night after night, you can order a Mythic Quel'Danas carry and land both kills in a single lockout, including the Ashes of Belo'ren mount roll.
For pugs that are clearing Belo'ren but stalling on Midnight Falls, the value calculus is different: you're already paying for the prog raid time, and a single-boss carry just adds a second kill to a lockout you're already in. The carry route makes the most sense for groups that haven't gotten the first kill yet and need to short-circuit the polarity-call learning curve.
Mythic Prog Checklist
Before your first Mythic pull, confirm the raid has:
- A WeakAura that flags your Light/Void Feather assignment and the matching mechanic colors. Wago has multiple Belo'ren polarity auras that update with the encounter timeline.
- A raid leader who calls the opening Radiant Echoes spawn axis within the first 5 seconds of the pull and a marker dropper who places raid markers immediately.
- Two interrupters per color assigned for phoenix lethal casts, with backup pairs covering deaths.
- Bloodlust assigned to the first egg phase, not the pull.
- Cooldown plan that aligns Aug Evoker buffs + Demonology Tyrant + Devourer DH on the second egg window.
If any of those five preconditions are missing, your first three pulls are diagnostic, not kill attempts. Treat them as data collection on which polarity calls your raid is mis-reading, and reset assignments before pull four. Raiders who want to skip the prog curve entirely can browse our WoW raid boost lineup for a scheduled team run instead.
Last reviewed 2026-06-17 against Patch 12.0.5 Lingering Shadows — Maintained by WowCarry's WoW team.
Frequently Asked Questions
Is Belo'ren the first or last boss in March on Quel'Danas?
Belo'ren is the first of two bosses. Midnight Falls is the final boss. The raid is a single wing with two encounters total; there is no "second-to-last" position because there's no third boss.
What item level do I need for Mythic Belo'ren?
Mythic Belo'ren is gated more by attunement and group composition than a hard ilvl floor. Most prog rosters land in the Hero-track range from Mythic+ Vault rolls and Heroic raid clears before pushing Mythic; Ashen Benediction healing stress is what scales with raid ilvl, so undergeared comps suffer most in Phase 2.
What is the Light/Void Feather polarity system?
Every raid member receives either a Light Feather or Void Feather debuff on pull. Matching color reduces damage from same-color mechanics by 50%; opposite color takes lethal damage. Four mechanics use this: Voidlight Convergence, Radiant Echoes, Light/Void Eruption, and Light/Void Edict.
How do I interrupt the phoenix adds?
Only matching-color players can interrupt a phoenix's lethal cast. Assign two interrupters per color, with backups, since a missed interrupt is a one-shot. Light Ember Phoenix needs a Light-Feather interrupter; Void Ember Phoenix needs a Void-Feather interrupter.
How long is the egg phase window?
Killing a phoenix drops an egg with a 15-second timer before the phoenix respawns at full HP. Burn the egg within that window or the phoenix returns at full HP and your DPS budget collapses. Bloodlust the first egg phase to lock in the burn before Ashen Benediction stacks bite.
What is the enrage timer on Mythic Belo'ren?
Hard enrage hits at 6 minutes. Soft enrage comes from stacking Ashen Benediction debuff through Phase 2, which puts healer mana under pressure as the multiplier scales linearly per stack.
Does Belo'ren drop the tier set token?
No. The tier set token (Chiming Void Curio) drops only from Midnight Falls, the second boss. Belo'ren drops off-pieces and is the source of the Ashes of Belo'ren mount on Mythic difficulty.