Key Takeaways
- Shadowmoon Burial Grounds was last active in the Mythic+ pool during Dragonflight Season 1 (patch 10.0.2, November 2022). It is not part of WoW Midnight Season 1 (March 2026) and awards no Great Vault rewards this season.
- The dungeon has four bosses: Sadana Bloodfury, Nhallish, Bonemaw, and Ner'zhul, each requiring sharp interrupt discipline and quick target-swapping.
- Interrupt priority was the core skill separating smooth runs from wipes: Shadowmoon Bone-Menders and Monstrous Corpse Spiders were the two most punishing trash casters.
- Bonemaw's Inhale was the single most disorienting mechanic in the dungeon. Pre-assigning pillar/rock positions before the pull prevented chaotic scrambling.
- Ner'zhul's Ritual of Bones required an immediate all-DPS switch to one skeleton. Failing this chain-break spawned a near-wipe add.
- On Tyrannical weeks, Sadana and Ner'zhul hit hardest; on Fortified, the Bone-Mender trash packs in the crypt entrance were the biggest gear check.
- The dungeon's linear layout kept percent completion manageable, with bosses alone covering a significant share of the total enemy forces count.
Overview: A Dragonflight Classic in Draenor's Shadow
Shadowmoon Burial Grounds originally launched as part of Warlords of Draenor in 2014, set deep within the haunted tombs of Shadowmoon Valley on Draenor. Blizzard brought it back as one of the returning legacy dungeons for Dragonflight Season 1, where it earned a reputation as a demanding but fair dungeon where interrupt rotations and positional discipline mattered as much as raw DPS.
As of June 2026, Shadowmoon Burial Grounds is not in the WoW Midnight Season 1 Mythic+ pool. The current Midnight Season 1 pool (launched March 24, 2026) consists of Windrunner Spire, Maisara Caverns, Magisters' Terrace, Nexus-Point Xenas, Algeth'ar Academy, Seat of the Triumvirate, Skyreach, and Pit of Saron. This guide serves as a historical reference for players who ran the dungeon during Dragonflight Season 1 or who want to understand its mechanics for Normal/Heroic revisits.
If you want to push keys in WoW Midnight's active Mythic+ pool, the current season offers eight dungeons with fresh routing, affixes, and Great Vault rewards.
Dungeon Layout and Route
Shadowmoon Burial Grounds used a predominantly linear layout with minor branching after the first room. The dungeon was located in Shadowmoon Valley, Draenor, accessible via the dungeon finder or by traveling to the zone entrance.
General Route Flow
- Crypt of the Ancients (entrance area): The first room offered a left or right path, both connecting to Nhallish with roughly equivalent difficulty. Most groups defaulted to left.
- Nhallish chamber: After clearing the mid-section trash, Nhallish was the second boss encountered in most route orders.
- Bonemaw approach: A narrow bridge led to the Bonemaw platform. Body-pull risk was high here, so slow, deliberate movement before engaging was mandatory.
- Burial Chamber (Ner'zhul): Two sets of trash packs stood between Bonemaw's platform and the final boss. These could not be skipped cleanly without Shroud of Concealment.
📌 Common mistake: Rushing the Bonemaw bridge approach caused accidental pulls that stacked mobs with the boss fight already in progress. Always stop, mark targets, and let any patrolling mobs move away before stepping onto the bridge.
Skip and Efficiency Notes
- The patrolling Void Spawn at the bottom of the staircase after the first room could be skipped cleanly by waiting for its patrol to move away before the group advanced.
- Shroud of Concealment or invisibility potions handled the non-essential trash packs on the Bonemaw approach path effectively.
- Boss kills alone covered a large portion of required enemy forces; groups did not need to pull every optional pack.
Trash Guide and Interrupt Priority
Interrupt discipline separated efficient runs from ones bleeding time and health through avoidable damage. Four trash types demanded immediate attention:
High-Priority Interrupt Targets
- Shadowmoon Bone-Mender: Shadow Mend was the highest-priority interrupt in the dungeon, a group heal that restored significant health to nearby enemies. Missing it on Fortified weeks was a near-guarantee of an overlength pull. Follow up by interrupting Shadow Bolt.
- Void Spawn: Void Pulse dealt heavy group-wide AoE shadow damage. Always pre-assigned to a ranged with a reliable interrupt.
- Monstrous Corpse Spider: Necrotic Burst applied a stacking disease DoT to the entire party. One missed cast could cascade into a healer mana crisis across subsequent packs.
- Plagued Bat: Interrupt Plague Spit to prevent disease stacks from accumulating.
Positioning Notes
- Mobs with Bone Flurry (frontal cleave) needed to be faced away from the party at all times; tank positioning was the key here.
- Humanoid mobs in the crypt entrance area were susceptible to Polymorph and Hex. Using these on Bone-Menders while the rest of the pack was being burned down kept Shadow Mend casts manageable when interrupt cooldowns were tight.
✏️ Technique tip: Establish a two-person interrupt rotation on Bone-Menders before the pull — one interrupt on Shadow Mend, a second on backup. A third DPS covering Void Spawn ensured no cast slipped through even when stagger timing overlapped.
Boss 1: Sadana Bloodfury
Sadana Bloodfury opened the dungeon as a deceptively punishing first boss. Her mechanics were straightforward to understand but required split-second execution.
Key Abilities
- Dark Communion: A Defiled Spirit spawned and walked toward Sadana. If it reached her, she healed for 10% of her maximum HP and gained a damage buff that stacked with each subsequent success. Killing the Spirit before contact was mandatory.
- Daggerfall: Sacrificial Daggers dropped on random players' positions, creating persistent ground pools. Poor placement filled the room and eliminated safe space for later phases.
- Unholy Ground: A large shadow pool spawned under a targeted player. Immediate movement was required; the DoT stacked quickly if players lingered.
- Luna Pierce: A frontal cleave targeted at the tank. The tank kept Sadana facing away from the party throughout the fight.
Strategy
- Assign one dedicated DPS to immediately target and burn the Defiled Spirit the instant it spawned. A focus macro helped enormously.
- Stack Daggerfall puddles at the far edge of the room in a single cluster. Scattering them across the floor made the fight progressively unplayable.
- Keep Sadana near the center of the room so both melee and ranged had unobstructed paths to dodge Unholy Ground.
⚠️ Warning: On Tyrannical, Sadana's healing from an unchecked Dark Communion was not just wasted effort — each stack of her damage buff pushed her output past what most healers could manage without cooldowns. Two missed Spirits in a row was generally a wipe.
Boss 2: Nhallish
Nhallish introduced the dungeon's most disorienting mechanic — Soul Shred — which temporarily removed all players from the normal combat plane.
Key Abilities
- Planar Shift: Nhallish phased out and teleported to a new position. Players needed to locate his new position immediately after the cast.
- Void Devastation: A massive void blast fired shortly after Planar Shift. Players still standing at his old location took lethal damage.
- Soul Shred: Banished all players to the Spectral Realm. Each player had to locate and defeat their own Soul to escape. Dying in the Spectral Realm caused a wipe.
- Void Bolt: A targeted shadow nuke on random players, either interrupted or healed through.
Strategy
- When Planar Shift cast, every player immediately moved toward Nhallish's new position, as the Void Devastation blast followed within seconds of the teleport landing.
- During Soul Shred, each player focused purely on their own Soul. Attempting to help others first caused delays that left the slow player stranded.
- Keeping the group loosely spread (not stacked) made repositioning after Planar Shift faster and prevented chain-knockback from Void Devastation clipping multiple players.
📌 Common mistake: Players who watched their party frames during Soul Shred instead of focusing their own Soul frequently died before escaping the Spectral Realm. The realm required individual execution — callouts were more useful than coordination during this phase.
Boss 3: Bonemaw
Bonemaw was the dungeon's most chaotic encounter: a large worm occupying a platform cluttered with bones, pillars, and spreading environmental hazards.
Key Abilities
- Inhale: A sustained suction effect that dragged all players toward Bonemaw's mouth. Players who were pulled in were removed from combat and took massive damage. Breaking line of sight behind a bone pile or pillar countered this completely.
- Body Slam: Bonemaw charged across the platform; players in the impact zone took high physical damage and were knocked back.
- Necrotic Pitch: Green pools spread across the platform throughout the fight. Standing in them applied a stacking DoT that was lethal if allowed to accumulate.
- Carrion Worms: Adds spawned periodically throughout the encounter. Their cleave damage overwhelmed healers if left alive.
Strategy
- Pre-assign specific pillars or bone piles for each player before the pull. During Inhale there was no time to make decisions under the suction pressure.
- Immediately swap to Carrion Worm adds on spawn. They were not optional; leaving even one up while managing Inhale and Necrotic Pitch created unrecoverable situations.
- Route Bonemaw's movement to keep Necrotic Pitch pools consolidated at one side of the platform rather than allowing them to scatter and tile the floor.
✏️ Technique tip: On higher Mythic+ keys, a Rogue's Shroud of Concealment on the approach bridge saved significant time and prevented accidental mob stacking before the pull. The platform itself had no good reset point once mobs were engaged.
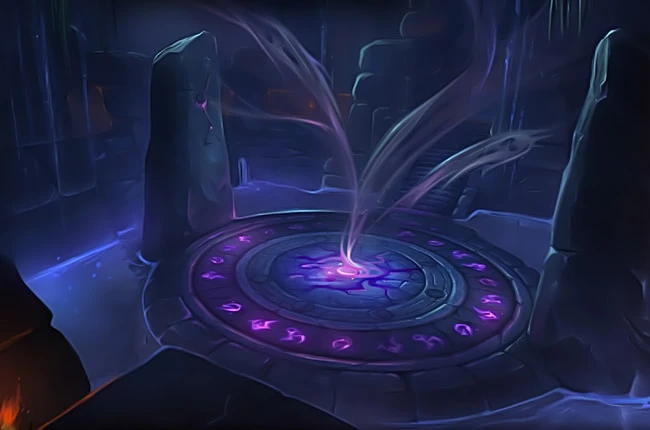
Boss 4: Ner'zhul
Ner'zhul served as the dungeon's final boss, a shadow-touched orc shaman whose mechanics escalated toward a soft enrage if the fight lasted too long.
Key Abilities
- Ritual of Bones: A ring of bone constructs chained together summoned around the platform. Breaking the chain required all DPS to immediately switch to one construct and kill it. Failure spawned a powerful add with near-wipe-level damage output.
- Malevolence: Shadow orbs radiated outward from Ner'zhul in expanding waves. Players moved between orbs to avoid them; standing still was lethal on higher key levels.
- Shadow Word: Pain (AoE): Persistent shadow damage applied to random targets throughout the fight, healer-intensive during overlapping mechanics.
- Ethereal Servants: Shadow adds that spawned periodically. Their casts needed interrupts; allowing them to finish caused significant party-wide damage.
- Touch of Ner'zhul: A heavy shadow debuff applied to the tank, requiring a defensive cooldown or external on higher keys.
- Unending Darkness: A soft enrage phase that activated if the fight dragged on, escalating damage intake past what healers could manage.
Strategy
- On Ritual of Bones, every DPS called their target and immediately burned a single skeleton in the ring to break the chain. This was non-negotiable: no boss damage, no healing, just the ring.
- Pre-assign interrupt order for Ethereal Servant casts before the pull, cycling through DPS with interrupt cooldowns to keep consistent coverage.
- Pop Bloodlust/Heroism at the start of the fight or at approximately 30% HP to beat Unending Darkness. Saving it for an emergency that arrived after the enrage window was already active helped no one.
⚠️ Warning: On Tyrannical weeks, Ritual of Bones failure was nearly always fatal. The summoned add hit harder than any trash in the dungeon and could not be quickly burned down while also managing Malevolence orb waves.
Affix Interactions (Dragonflight Season 1 Context)
Since Shadowmoon Burial Grounds was last active in Dragonflight Season 1, affix interactions below reflect that season's affix pool. No Midnight Season 1 affix notes apply.
Tyrannical
Both Sadana Bloodfury and Ner'zhul scaled lethally under Tyrannical. Sadana's Dark Communion stacks compounded with her increased HP making full-heal recoveries nearly impossible. Ner'zhul's Ritual of Bones left even less margin for error when the add summoned by a missed break hit harder than baseline.
Fortified
Fortified inflated Shadowmoon Bone-Menders and Monstrous Corpse Spiders significantly. Interrupt discipline became the primary skill gate; groups with loose rotation assignments frequently wiped on trash rather than bosses on high Fortified keys.
Bolstering
Bolstering required careful kill sequencing in packs that mixed Bone-Menders with lower-health fodder mobs. Burning down small mobs first and leaving Bone-Menders last prevented the menders from gaining a Bolstering stack that made their casts nearly unkillable.
Gearing and Season Context
Shadowmoon Burial Grounds awarded item level 385 loot at Mythic+0 during Dragonflight Season 1, scaling upward with key level. Great Vault slot rewards from the dungeon were available throughout that season.
As of patch 12.0.5 in WoW Midnight, no Great Vault rewards are available from Shadowmoon Burial Grounds, as the dungeon is not in the active pool. Players looking to progress gear through Mythic+ this season should focus on the eight current Midnight Season 1 dungeons.
For players returning to the game and working toward current Mythic+ readiness, the WoW character boost and gear services offer a fast path to the item level needed for Midnight's key levels. Once in the current season's pool, you can also secure raid-tier gear through Midnight raid carries to supplement Mythic+ progression.
Frequently Asked Questions
Is Shadowmoon Burial Grounds in Mythic+ for WoW Midnight Season 1?
No. Shadowmoon Burial Grounds is not in the Midnight Season 1 Mythic+ pool. The eight active dungeons as of March 24, 2026 are: Windrunner Spire, Maisara Caverns, Magisters' Terrace, Nexus-Point Xenas, Algeth'ar Academy, Seat of the Triumvirate, Skyreach, and Pit of Saron.
When was Shadowmoon Burial Grounds last in the Mythic+ pool?
The dungeon was last active during Dragonflight Season 1, which launched with patch 10.0.2 in November 2022. It has not appeared in a Mythic+ season since.
How many bosses does Shadowmoon Burial Grounds have?
The dungeon has exactly four bosses: Sadana Bloodfury, Nhallish, Bonemaw, and Ner'zhul, in that encounter order for most routes.
What was the hardest trash to handle in Shadowmoon Burial Grounds?
Shadowmoon Bone-Menders were the most punishing trash caster. Their Shadow Mend could undo a significant portion of a pull's damage if left uninterrupted. Monstrous Corpse Spiders were a close second due to the disease DoT stacks from Necrotic Burst affecting the entire party.
What was the best use of Bloodlust/Heroism in Shadowmoon Burial Grounds?
On Ner'zhul, most groups used Bloodlust at the start of the fight or at roughly 30% HP to beat the Unending Darkness soft enrage. On Tyrannical weeks with Sadana causing problems, some groups saved it for Sadana to minimize the window where Dark Communion stacks could accumulate.
How did groups handle Bonemaw's Inhale mechanic?
The standard approach was pre-assigning specific pillars or bone piles to each player before the pull. During Inhale, every player moved immediately to their assigned object to break line of sight. Ad-hoc scrambling for cover rarely worked at higher key levels.
Can you skip trash in Shadowmoon Burial Grounds?
Yes. The dungeon's total enemy forces count was low enough that bosses covered a substantial share. The patrolling Void Spawn near the first staircase was skippable by timing movement around its patrol path. Shroud of Concealment or invisibility potions handled the optional packs on the Bonemaw bridge approach.
Was Shadowmoon Burial Grounds originally a Mythic+ dungeon?
No. It was introduced as a standard Warlords of Draenor dungeon in 2014 and was later added to the Mythic+ system when Blizzard included it in the Dragonflight Season 1 returning legacy pool.
Last reviewed 2026-06-17 against Patch 12.0.5 Lingering Shadows — Maintained by WowCarry's WoW team.