Introduction
Welcome to the WowCarry's guide to Freehold, a part of the Dragonflight Season 2 dungeon pool in World of Warcraft. In this comprehensive guide, we'll cover everything you need to know about notable trash mobs, interrupts, and boss mechanics. We appreciate your feedback on these dungeon guides in the comments below, so feel free to let us know if you'd like more quick guides or in-depth content.
Notable Trash Mobs
Before diving into the boss encounters, let's take a look at some of the most significant trash mobs you'll face in Freehold. These enemies possess unique abilities that may cause trouble for your group if not handled properly. Here's a table summarizing the most important trash mobs, their abilities, and tips for dealing with them:
| Trash Mob | Ability Name | Tips for Dealing |
| Iron Tide Enforcers | Brutal Backhand | Avoid standing in frontal cone |
| Bone Saw | Filthy Blade | Monitor stacking healing reduction |
| Oarsman | Sea Spout | Interrupt ability, avoid swirls |
| Vermin Trappers | Traps | Watch for traps, avoid damage |
| Bilge Rat Brine Scales | Frost Blast | Interrupt ability, large AOE |
| Buccaneers | Going Bananas | Stun or incapacitate if possible |
| Harpooners | Grip, Bellowing Roar | Interrupt Bellowing Roar, avoid grip |
| Scrappers | Fixate | Use stun or knockback |
| Storm Caller | Thundering Squall | Interrupt large AOE circle |
| Officer | Oiled Blade debuff | Dispel tanks |
Boss Guide Summary
We want to dive at each boss mechanic, so let's do it!
First Boss: Sky Captain Crag
In the first encounter of Freehold, you'll face off against Sky Captain Crag. This boss has several abilities that your group must be aware of to successfully navigate the fight.
Charges and Dive Bombs
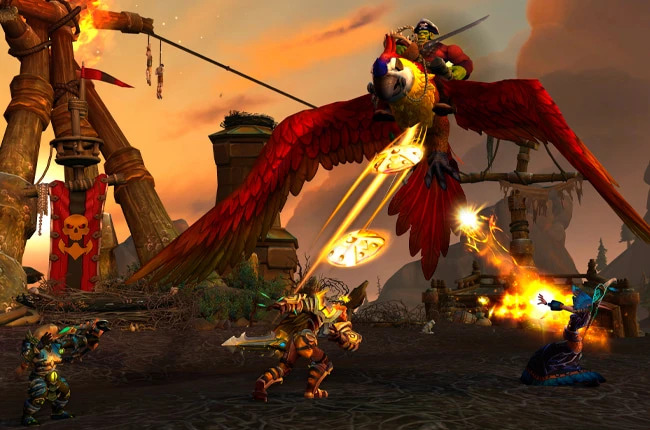
In Phase 1, Sky Captain Crag swoops around on his bird, charging towards random enemies and dealing damage while knocking them back. Be sure to avoid these charges and dive bombs to minimize damage taken.
Vile Bombardment
Ranged players should be cautious of Vile Bombardment, which targets them and spawns a vile puddle at their location. These puddles deal damage on impact and while standing in them. Make sure to bait this ability away from the boss and melee players to prevent unnecessary damage.
Azerite Powder Shot
Sky Captain Crag casts Azerite Powder Shot, a frontal cone ability aimed towards a random player. Ensure your group is spread out around the boss so multiple players don't get hit. The ability also leaves a dispellable DOT on players hit, so be prepared to remove it when necessary.
Revitalizing Brew
Interrupting Revitalizing Brew is crucial, as it heals the boss significantly if left unchecked. Once you've interrupted the brew, players can chuck it instead to heal themselves or their teammates.
Second Boss: Council o' Captains
The second boss encounter in Freehold features the Council o' Captains, where you'll face Eudora and Raul. Each captain has their own set of abilities that require careful handling.
Eudora's Powder Shot and Grapeshot
Eudora will shoot random players with Powder Shot and occasionally jump away to start spraying the area with Grapeshot. This massive cone ability fires multiple times, so quickly move behind the boss or stay close to have an easier time dodging the shots.
Raul's Barrel Mechanics
Raul, the second captain, summons barrels throughout the encounter. These barrels explode after a few seconds, dealing significant damage to the party. Prioritize damaging the barrels to destroy them before they explode, and be sure to avoid standing in the Barrel Smash ground effect.
Bartender Rummy Mancomb
Bartender Rummy Mancomb will throw out different colored brews during the fight. The brown brews grant beneficial effects, while the green brews inflict harmful effects. Aim to utilize the brown brews and avoid the green ones to maximize your party's performance.
Third Boss: Ring of Booty
The third encounter in Freehold is a three-phase fight called the Ring of Booty. In this encounter, you'll have to complete various objectives before facing the boss, Sharknado.
Greased-up Pig
In the first phase, your group must catch a greased-up pig that runs around the arena. Have your party coordinate to corner and catch the pig to advance to the next phase.
Turtle Miniboss
Phase two consists of a turtle miniboss that spawns in the center of the arena. Dispatch the turtle quickly to move on to the final phase of the encounter.
Boss: Sharknado
In the third and final phase, you'll face Sharknado. It's crucial to maintain a safe distance from the boss and avoid the Chum pools. Kite any summoned sharks into these pools to deal damage and defeat them.
Last Boss: Harlan Sweete
The final boss of Freehold is Harlan Sweete, a pirate captain with several potent abilities that will test your group's coordination and movement skills.
Iron-tide Add
An Iron-tide add will spawn during the encounter. Use crowd control, stuns, and nuke it down to prevent its explosion ability from damaging your party.
Swift Wind Saber and Cannon Barrage
Harlan Sweete casts Swift Wind Saber, sending out blades that move in a straight line, and Cannon Barrage, which targets large sections of the arena with cannon fire. Move slowly and in short increments to dodge these abilities. At 60% HP, all abilities target the entire party, so stack and move as a group for Cannon Barrage.
Burn Phase at 30% HP
At 30% HP, Harlan's attack speed and damage taken increase, signaling the start of the burn phase. Your group should focus on DPS and dodging abilities to finish off the boss before he overwhelms your party.
Final Thoughts
Freehold is a challenging and engaging dungeon that requires your group to understand and execute proper strategies for trash mobs and bosses alike. By following this guide and practicing each encounter, you'll be well-equipped to conquer the dungeon in Dragonflight Season 2. Remember, coordination and communication are key to success in Freehold.
Video Version of the Guide
For those who prefer a more visual learning experience, we attach a video version of this Freehold Mythic+ Dungeon Guide for Dragonflight Season 2. The video guide offers a step-by-step walkthrough of each boss encounter and additional tips to help you and your group succeed. Happy dungeon diving!