Key Takeaways
Clean floor management decides this encounter: place rifts deliberately, route rays through open ground, and preserve space for the armor-break ramp.
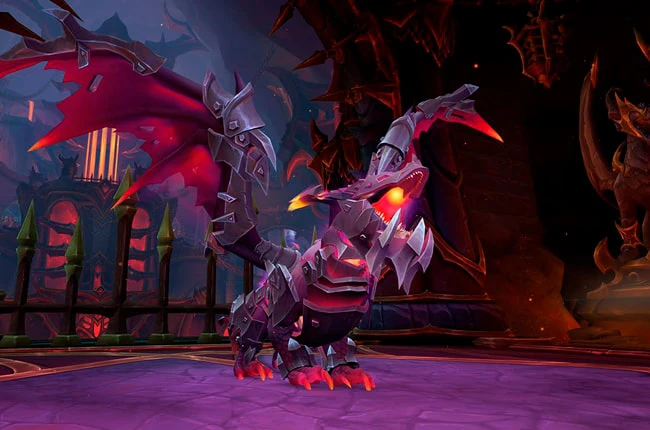
- Kazzara the Hellforged is the first boss of Aberrus, the Shadowed Crucible. It is a one-phase, single-target encounter from Dragonflight Patch 10.1.
- Players marked by Dread Rifts spread before the marks erupt, while players chased by Rays of Anguish keep their Molten Scar trails out of the raid.
- Hellsteel Carnage makes the encounter progressively busier as Kazzara loses armor, so save movement space and healing tools for the final stretch.
- Tanks swap after every Terror Claws cast and keep Kazzara pointed away from the raid.
- Dodge the frontal Hellbeam, and stand far enough from hazards that the push from Wings of Extinction remains safe.
- Normal rays expire on their own. Heroic rays must be led into active rifts. Mythic adds Infernal Fusion, which punishes a ray for crossing an old Molten Scar.
Difficulty determines how strictly the raid must manage those lanes.
Kazzara as a Legacy Aberrus Encounter
Aberrus opened during the week of May 9, 2023, after Embers of Neltharion launched on May 2. Kazzara guarded The Discarded Works as its opening encounter. In 2026, this is Dragonflight legacy content; the tactics below preserve its documented mechanics without current-tier framing.
Kazzara has no add phase or formal phase transition. The same sequence repeats while shattered armor increases hazards and exposed-core pressure.
| Difficulty | Ray behavior | Core assignment |
|---|---|---|
| Normal | Rays expire after their duration | Spread rifts and preserve open floor |
| Heroic | Rays persist until they hit active rifts | Pair every ray with a rift |
| Mythic | A ray crossing an old Molten Scar triggers Infernal Fusion | Use clean, noncrossing lanes |
If you are planning current progression, browse current WoW raid options.
Raid Setup and Positioning
Use two tanks. Normal and Heroic allow flexible raid sizes; Mythic uses a fixed 20-player roster. Start Kazzara near one side with the tanks outside and the raid in a loose arc behind her. Keep the center and one lateral route open for later rays.
Before pulling, choose the first rift locations, the group's rotation direction, and Bloodlust timing. Consistency matters because Dread Rift targets change each pull.
Tank Responsibilities
Face Kazzara away from the group and swap after each Terror Claws. It combines Physical and Shadowflame damage, leaves periodic damage, and makes the next claw dangerous. The free tank taunts as the cast resolves while the target mitigates the hit.
Move Kazzara only when the safe area fails. Frequent turns make Hellbeam harder to read and can point it through ranged players.
Healer Responsibilities
Plan healing around Wings of Extinction, Hellbeam's raid pulse, and armor loss. Later breaks intensify Infernal Heart and add more Revenant's Blood, making the end most demanding.
Support marked players without asking them to cut through the stack. A personal defensive is safer than abandoning an assigned lane.
Damage-Dealer Responsibilities
This is pure boss damage, but movement outranks uptime. Ranged players leave melee room around Hellbeam; melee stay off the tank side. Use movement abilities carefully during Wings of Extinction because landing in a Riftburn zone or Molten Scar is worse than losing a global cooldown.
Kazzara Normal Strategy
Dread Rift targets move more than five yards from every other player and drop their marks in the assigned outer area. The marks erupt after five seconds and leave Riftburn. Armor loss adds targets, so compact, nonoverlapping placement saves room.
Rays of Anguish fixate players and draw Molten Scar trails. On Normal, move through open ground until the ray expires; never cross the raid, tanks, or a future rift lane to take a shortcut.
💡 Positioning tip: leave a clear strip between the raid and the edge. Rifts use the outside while rays travel through the strip.
At 100 energy, Kazzara locks Hellbeam in one direction; leave its telegraph until the channel ends. Before Wings of Extinction, step away from the edge and existing hazards. Armor breaks add fragments, rifts, and healing pressure.
Kazzara Heroic Strategy
Heroic makes ray cleanup mandatory. Each Ray of Anguish persists until led through an active Dread Rift; the collision ends both. Every target identifies a destination before moving.
Assign each ray a different active rift. Once one ray clears a rift, another has no target there. A ray surviving into the next set gains Relentless Torment, speeds up, and pulses escalating raid damage.
📌 Heroic assignment: pair rays and rifts by position, such as leftmost to leftmost, so targets move without individual voice calls.
Angle the approach so Molten Scar stays outside the group. The ray must touch the rift; the player need not enter it.
Kazzara Mythic Strategy
Mythic adds Infernal Fusion: a Ray of Anguish crossing an existing Molten Scar damages the raid. Each ray needs a clean line to a surviving rift.
Line early rifts along an outside lane and guide matching rays straight through them. When that side becomes cluttered, shift the raid to the clean half. Move Kazzara only with a planned boss-movement strategy; a centered plan keeps her fixed while the raid changes sides.
⚠️ Mythic warning: if the intended rift is blocked, call it and choose another clean line instead of improvising across old trails.
The late pull combines more targets, hazards, and ambient pressure. Use raid defensives at armor breaks and save mobility for the following rays.
Repeatable Ability Order
Kazzara's casts can drift slightly with movement and tuning, but the repeatable planning sequence remains useful:
- Dread Rifts: marked players spread and place the next set in the assigned lane.
- Wings of Extinction: the raid prepares for damage, the periodic effect, and the knockback.
- Rays of Anguish: targets move through clean ground; Heroic and Mythic targets guide their rays into active rifts.
- Hellbeam: everyone leaves the frontal while healers cover its raid pulse.
Hellsteel Carnage is a separate health-triggered checkpoint, not a fifth cast in every loop. When it interrupts or overlaps the sequence, dodge falling fragments and Revenant's Blood, stabilize the raid, and then resume the four-cast plan. React to the armor-loss cast and animation rather than relying on one memorized percentage set; this keeps the plan valid across original and later Dragonflight tuning.
Common Mistakes
The fight punishes small positioning errors most severely after Kazzara loses armor. Review these failure patterns before the pull so ray assignments remain readable as the floor fills.
- Scattering rifts: random placement removes safe ray lanes and consumes the room too early.
- Stacking rift marks: each eruption threatens nearby players even when the final zones look compact.
- Running a ray through the group: the fixated player controls the trail and should take the longer safe route when needed.
- Using the same Heroic solution on Normal: Normal rays expire naturally, so forcing them through rifts creates needless danger.
- Missing the tank swap: the Terror Claws vulnerability makes consecutive hits unsafe.
- Ignoring the knockback: safe footing before Wings of Extinction matters more than squeezing in one extra cast.
- Crossing old trails on Mythic: one Infernal Fusion can combine with ambient damage and overwhelm the raid.
Most failures come from lane management rather than boss damage. Clean placement early makes the last armor segment far easier to control.
Frequently Asked Questions
These answers preserve the encounter's documented rules while separating original and Awakened Dragonflight tuning.
Is Kazzara a current raid boss?
No. Kazzara is a Dragonflight Patch 10.1 encounter from Aberrus, which opened in May 2023 as the Dragonflight Season 2 raid. Use this page to review the documented encounter mechanics; its historical item levels, reward structure, and damage tuning are not recommendations for current progression.
Do Rays of Anguish expire on Normal?
Yes. Normal and Raid Finder rays end after their duration and do not require a Dread Rift collision. The moving beam still damages players who touch it and leaves a Molten Scar behind, so carry it through open floor and away from the group until the effect ends.
What changes on Heroic Kazzara?
Rays of Anguish persist until they pass through active Dread Rifts. Assign each ray a distinct live rift and approach from an angle that leaves its Molten Scar outside the raid. A ray left alive into the next set gains Relentless Torment, moves faster, and repeatedly damages the group.
What changes on Mythic Kazzara?
Infernal Fusion triggers when a Ray of Anguish crosses an existing Molten Scar. The assigned active Dread Rift is the ray's valid destination, but every old trail between the target and that rift is dangerous. Align rifts and rays in clean lanes, then move the raid's working area to unused floor.
When should tanks swap?
Swap after every Terror Claws cast. The ability combines Physical and Shadowflame damage, leaves a periodic effect, and makes another claw on the same tank dangerous during the vulnerability. The free tank should taunt as the cast resolves while the targeted tank mitigates the initial hit and receives follow-up healing.
When should the raid use Bloodlust?
Using Bloodlust on the pull gives every player clean uptime and is the simple default. Groups progressing at the fight's intended power level could instead save it for the final armor segment when Infernal Heart and floor hazards are most demanding. Choose the timing that addresses the group's actual failure point.
Why do old guides show different armor-break percentages?
Current reference pages preserve different tuning snapshots: Wowhead's journal and Normal/Heroic material show 80%, 60%, and 40%, while Method's Awakened guide shows 70%, 50%, and 30%. Watch the Hellsteel Carnage cast and armor animation rather than assuming one set applies to every version.
Does Kazzara have phases or adds?
No. Kazzara is a one-phase, single-target fight with no add wave. Hellsteel Carnage armor-loss events occur inside the same repeating encounter rather than starting new phases. Each armor break adds more rift targets, floor hazards, and Infernal Heart pressure, so the loop grows harder without changing its basic structure.
Last reviewed 2026-08-20 against Patch 10.1 Embers of Neltharion — Maintained by WowCarry's WoW team.