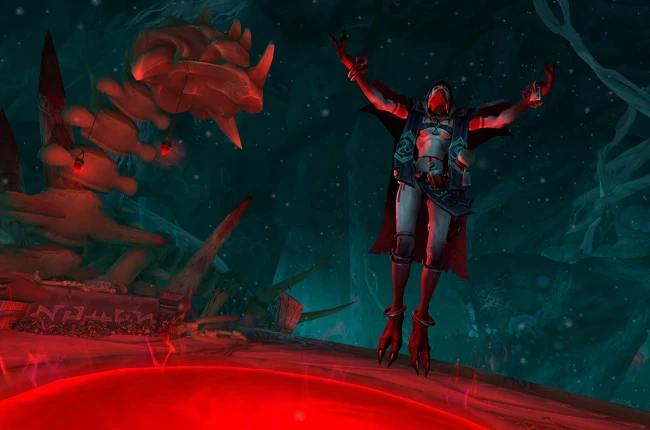
The Underrot in Dragonflight Season 2
The Underrot is a Battle for Azeroth dungeon buried beneath Nazmir, and it returned as one of the four legacy dungeons in the Dragonflight Season 2 (Patch 10.1) Mythic+ rotation. Its bosses and trash packs still exist in-game, so this rundown of notable trash, boss mechanics, and the interrupts that matter holds up whenever you run the place at Mythic-0, Heroic, or in a key.
Key Takeaways
- The four bosses are Elder Leaxa, Cragmaw the Infested, Sporecaller Zancha, and the Unbound Abomination, in that order.
- Elder Leaxa's Blood Bolt is a hard interrupt, and her Blood Effigy clone casts the same spells, so split interrupts across both.
- Cragmaw the Infested spawns Blood Tick Larva from Indigestion, Charge, and Tantrum; stomp every larva before it matures into a Blood Tick.
- Sporecaller Zancha is a mushroom-clearing race: destroy the spore mushrooms with Shockwave and Upheaval before Festering Harvest stacks Decaying Spore on the group.
- The Unbound Abomination converts all damage into energy, so you burst the Blood Visage adds, not the boss, while staying in Cleansing Light to clear Putrid Blood.
- Living Rot, Deathspeaker frenzies, and Bloodsworn Defiler totems are the trash that wipes pugs; stun, interrupt, and outrange them.
With the priority order set, here is the pull-by-pull detail, starting with the trash.
Notable Trash Mobs
The Underrot's packs lean heavily on interrupts and frontal dodges. These are the casts worth tracking:
| Trash Mob | Ability Name | Tips for Dealing |
|---|---|---|
| Fetid Maggot | Rotten Bile | Interrupt or sidestep the frontal cone ability. |
| Chosen Blood Matron | Warcry, Blood Harvest, Savage Cleave | Interrupt Warcry and keep enemies away from the Blood Matron to prevent Savage Cleave. |
| Devout Blood Priest | Dark Reconstitution | Interrupt the heal. |
| Befouled Spirit | Dark Omen | Move away from others when targeted. |
| Diseased Lasher | Decaying Mind | Always interrupt this ability. |
| Living Rot | Constant AoE, spawns puddles | Stun to keep it in check. |
| Feral Bloodswarmer | Sonic Screech | Be cautious when casting to avoid being interrupted and locked out. |
| Fallen Deathspeaker | Wicked Frenzy | Interrupt this ability to prevent mobs from gaining 100 Haste. |
| Reanimated Guardian | Bone Shield | Purge away the shield when it is applied. |
| Grotesque Horror | Dark Echoes, Void Spit | Interrupt both abilities if possible. |
| Bloodsworn Defiler | Withering Curse, Shadow Bolt Volley | Interrupt both abilities and outrange the Spirit Drain totem when it spawns. |
Clear those packs cleanly and the boss fights become far more forgiving. Here is how each encounter plays out.
Boss 1: Elder Leaxa
Elder Leaxa is a caster fight built around interrupts and a mirror-image add.
Blood Bolt
Always interrupt Blood Bolt as it deals significant single-target damage. If a Warrior is in the party and targeted, they can use Spell Reflect to turn it back on the boss.
Creeping Rot
Dodge Creeping Rot, a frontal cone that travels forward. Avoid it at all costs.
Sanguine Feast
When Elder Leaxa teleports to a player, she casts Sanguine Feast, dealing damage in a 4-yard radius around her. Avoid standing near the boss during this ability.
Blood Effigy
Elder Leaxa spawns a Blood Effigy, a mirror image that also casts Blood Bolt and Creeping Rot. Split interrupts and damage onto the Effigy so you are not overwhelmed by two casters needing kicks at once.
Boss 2: Cragmaw the Infested
Cragmaw the Infested is a larva-management fight: nearly every ability spawns Blood Tick Larva that must be stomped before they grow.
Indigestion
Cragmaw suffers from Indigestion and violently vomits at the tank, dealing cone damage and spawning Blood Tick Larva. Players run over and stomp the larva, or they grow into Blood Ticks after 8 seconds. Aim the cone toward a wall to shrink the area where larva spawn.
Charge
Cragmaw will Charge a random player, spawning larva in its path. Aim the charge toward a wall or other nearby obstacle to keep the trail short.
Tantrum
At 100 energy, Cragmaw throws a Tantrum, running around the room, dealing damage to everyone, and spawning larva everywhere. Use a personal defensive whenever Tantrum is feasible, hold a section of the room, and squash every emerging larva so none reach maturity.
Boss 3: Sporecaller Zancha
Sporecaller Zancha is a mushroom-clearing race against the boss's energy bar.
Shockwave and Upheaval
When you engage Sporecaller Zancha, mushrooms encircle the boss area. Stepping on a mushroom explodes it, applying a stack of Decaying Spore, a harmful debuff that deals heavy damage. The goal is to clear all mushrooms before the boss reaches 100 energy and casts Festering Harvest, which applies one Decaying Spore stack for every remaining mushroom. Clear them with the boss's frontal cone Shockwave and with Upheaval, which targets two players and destroys mushrooms in an 8-yard radius. Abilities like Paladin bubble can also clear mushrooms, but be ready to take the damage.
Festering Harvest
Players should dodge swirling Festering Harvest that create spore pods, as they apply more stacks of Decaying Spore. Spores are bad, so keep moving.
Boss 4: Unbound Abomination
The Unbound Abomination absorbs all damage and converts it to energy, so the kill comes from its adds rather than the boss itself.
Energy and Adds
At 100 energy, the boss spawns two Blood Visage adds. Killing an add deals 17% of the boss's HP in damage to it. Keep feeding the boss damage to spawn more adds and burst them down.
Vile Expulsion
Position the boss far from the group and stack everyone on the tank. When the boss casts Vile Expulsion, everyone moves forward, away from the cone and the webs that spawn. Move the boss with the group, then turn it to aim toward the fresh webs. Re-stack on the tank and repeat, dragging the boss after each expulsion.
Putrid Blood and Cleansing Light
The boss applies stacks of Putrid Blood on everyone, a magic debuff that deals heavy damage. Players hit by Cleansing Light gain a 10-yard circle that dispels Putrid Blood from anyone inside and removes webs from the ground. Always stand in Cleansing Light and clear webs while you do.
Rotting Spores
Swarms of Rotting Spores spawn throughout the fight. Killing one leaves a web patch. They slowly drift toward players and explode for fatal damage if they connect, so use knockbacks, grips, and stuns to keep them away. They carry more health than in earlier iterations, making them tougher to clear.
Frequently Asked Questions
Where is The Underrot located?
The Underrot sits beneath Nazmir in southern Zandalar, entered from the Altar of Rot in the pit that surrounds the Uldir raid. It is a Battle for Azeroth dungeon themed around the blood god G'huun's corruption.
Which season featured The Underrot in Mythic+?
The Underrot was one of the four returning legacy dungeons in the Dragonflight Season 2 Mythic+ pool, which launched with Patch 10.1. It rotated in alongside Freehold, Neltharion's Lair, and the Vortex Pinnacle.
Who are the four Underrot bosses?
In order, they are Elder Leaxa, Cragmaw the Infested, Sporecaller Zancha, and the Unbound Abomination. Each leans on a different mechanic: interrupts, larva control, mushroom clearing, and add burst.
How do you kill the Unbound Abomination?
You never burn the Unbound Abomination directly, because it converts your damage into energy. Instead you damage it to spawn Blood Visage adds at 100 energy, then kill an add to deal 17% of the boss's health back to it. Repeat while staying inside Cleansing Light to clear Putrid Blood.
What is the most important interrupt in The Underrot?
On bosses, Elder Leaxa's Blood Bolt is the priority kick. In trash, the Devout Blood Priest's Dark Reconstitution heal and the Fallen Deathspeaker's Wicked Frenzy are the two casts that swing pulls hardest if they land.
How do you handle Cragmaw the Infested's larva?
Every Cragmaw ability (Indigestion, Charge, and Tantrum) spawns Blood Tick Larva. Run over and stomp each larva within 8 seconds, or it matures into a Blood Tick. Aiming cones and charges into walls keeps the larva clustered and easy to clear.
Is this Underrot guide still accurate?
Yes. The Underrot's boss and trash mechanics are unchanged in-game, so the interrupts and movement here apply whenever the dungeon appears in a Mythic+ rotation or is run at Mythic-0 or Heroic.
Final Thoughts
The Underrot rewards clean trash pulls and disciplined interrupts more than raw damage. Manage Cragmaw's larva, win the mushroom race against Sporecaller Zancha, and respect the Unbound Abomination's energy conversion, and the dungeon falls quickly. Players chasing a higher key can book a Mythic+ key boost to push past a wall with a coordinated group.
Last reviewed 2026-06-23 against Patch 10.1 Embers of Neltharion (Dragonflight Season 2) — Maintained by WowCarry's WoW team.
Video Guide
For readers who prefer video, the run below visually demonstrates the strategies and mechanics covered here.