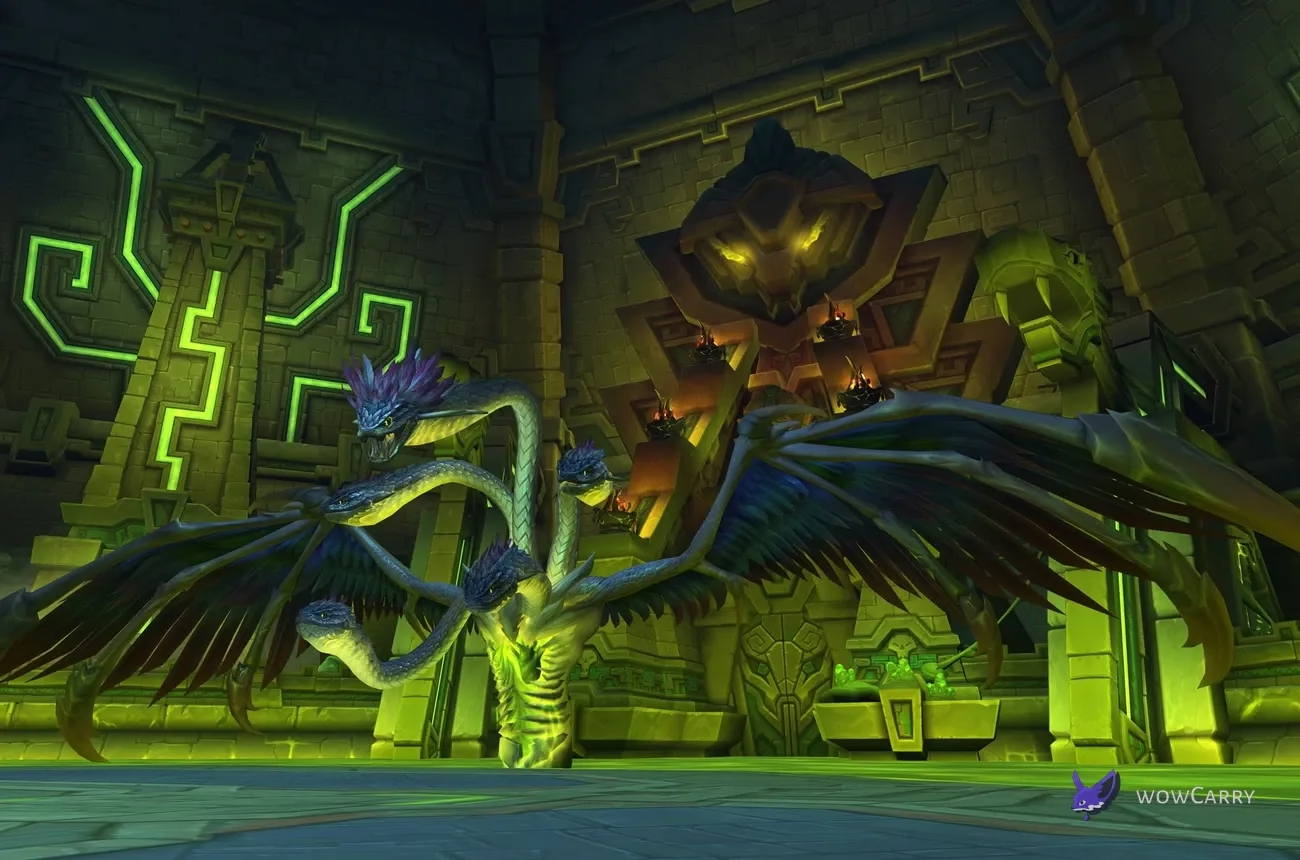
How the Final Encounter Works
Ula'tek is a three-stage final boss about egg control, split add work, and a shrinking platform. Keep eggs clear of venom, rotate group soaks, then coordinate helpers and safe lanes. For every encounter and preparation step, view the complete raid guide.
Key Takeaways
- Malignant Shell lets Normal and Heroic players carry eggs, but venom hatches a Viper and applies raid-wide Putrid Membrane for the rest of the pull.
- Spectral Coils needs 40% of the raid for minimum damage, while Heroic and Mythic Soul Constrictor only prevents players who mitigated one impact from mitigating the next, so eligible groups alternate.
- Mother's Wrath, Gore Rattle's Rattler Slam, and Unchecked Rage punish either tank for leaving melee range.
- Rage of the Shackled exposes the Venomous Heart for 20 seconds at +200% damage taken, which is three times baseline damage.
- Heroic Grasping Fangs targets three players per side regardless of raid size, and every break applies Blight Vein to the raid.
- Serpent's Bite requires nearby helpers, Volatile Purge requires immediate separation, and Circling Prey requires a full platform evacuation.
Those assignments remain the backbone of every difficulty plan.
Quick Pull Plan and Raid Assignments
Split the roster into left and right teams with a tank, healer coverage, interrupts, poison dispels, and carriers on each side. Assign exact eligible groups. Add a Heart damage call and three Serpent's Bite helper sectors. Mythic also needs four Toxic Incubation interceptors and rotating carriers.
| Assignment | Baseline job | Higher-difficulty adjustment |
|---|---|---|
| Boss tank | Keep Ula'tek in melee and return after Mother's Wrath | Preserve a safe facing during Mythic incubation waves |
| Tail tank | Keep Gore Rattle in melee and swap during the planned wave movement | Call when movement would leave either aspect without a target |
| Coils groups A/B | Meet the 40%-of-raid minimum at each assigned impact | On Heroic/Mythic, alternate because only the next impact excludes prior mitigators |
| Side groups | Kill the warden, clear small eggs, deliver the large egg, interrupt the weakened add | Stagger Heroic tethers; synchronize Mythic large-add kills |
| Phase 3 helpers | Enter Bite circles until the debuff clears, then spread with Purge | Mythic helpers aim outgoing waves into empty space |
Balance both sides for interrupts, poison dispels, mobile carriers, and damage.
📌 Roster check: count 40% of the actual raid size for every Spectral Coils assignment; old fixed-player charts became invalid with the August 20 hotfix.
Use one marker per side, one center return point, and a next-platform marker that moves before Circling Prey.
Fight Timeline and Cooldown Plan
Ula'tek's transitions are mechanic-driven, so use the live boss timer for exact clocks after the Heroic Coils adjustment.
| Stage | Primary sequence | Cooldown use |
|---|---|---|
| Stage 1 | Ula'tek's Bond shares damage across aspects; carry eggs, dodge Caustic Waves, soak Coils, then hit the Heart | Tank externals for Mother's Wrath; burst cooldowns into the exposed Heart |
| Stage 2 | Split for Doomscale Wardens and Malice, resolve eggs and cauldrons, kill weakened adds, then complete another Heart window | Side-specific add control and defensive coverage; do not spend every cooldown on the first finished side |
| The Shattering | Collect falling eggs and move through consecutive Coils soaks while clearing weakened adds | Alternate healing cooldowns with eligible soak groups |
| Stage 3 | Break clutches, clear Bite, spread Purge, dodge waves, evacuate the destroyed quadrant | Raid haste and remaining damage cooldowns before safe quadrants run out |
For 20 seconds, the exposed Heart has +200% damage taken, which equals 3x baseline damage. Avoid calling this window “double damage.”
Egg Rules and Add Priorities
Egg handling changes by difficulty, but touching venom or finishing gestation always hatches an empowered Viper. Each hatch adds Putrid Membrane to the raid for one hour.
Normal and Heroic egg outcomes
Touch an egg to carry Malignant Shell, then avoid waves and venom until the assigned break. Breaking an egg early creates a weaker Blightscale Rawling with Poisonous Bite on Heroic. The bite is a stacking ten-second Poison effect on its target.
A hatched Blightscale Viper using Acidic Burst applies an 18-second Poison DoT to a random player. Heroic Vipers also use Petrifying Sting, which petrifies players within ten yards and creates a healing absorb. Dispel Poisonous Bite and Acidic Burst; heal through Petrifying Sting rather than assigning a dispel.
✏️ Egg-carry technique: carriers stop before Caustic Waves begin and move only through a confirmed gap; one extra global of damage is never worth hatching a Viper and adding Putrid Membrane for the rest of the fight.
Stack weakened adds away from carrier routes and clear them before the next egg set.
Mythic carrier rules
Mythic eggs begin Hardened and cannot move until their absorb is broken. Picking one up applies Noxious Shell. Two carriers within three yards cause an instant hatch and severe damage, so each carrier owns a separate lane.
When the shell is removed, Rancid Yolk increases damage from another shell by 200% for 20 seconds. Rotate carriers. Mythic Rawlings gain Boiling Venom after 25 seconds, doubling haste and damage while enabling Acidic Expulsion, a raid hit followed by a 35-second DoT.
Kill Rawlings before the 25-second boil and name replacement carriers after Rancid Yolk.
Stage 1: Tanks, Waves, Soaks, and the Heart
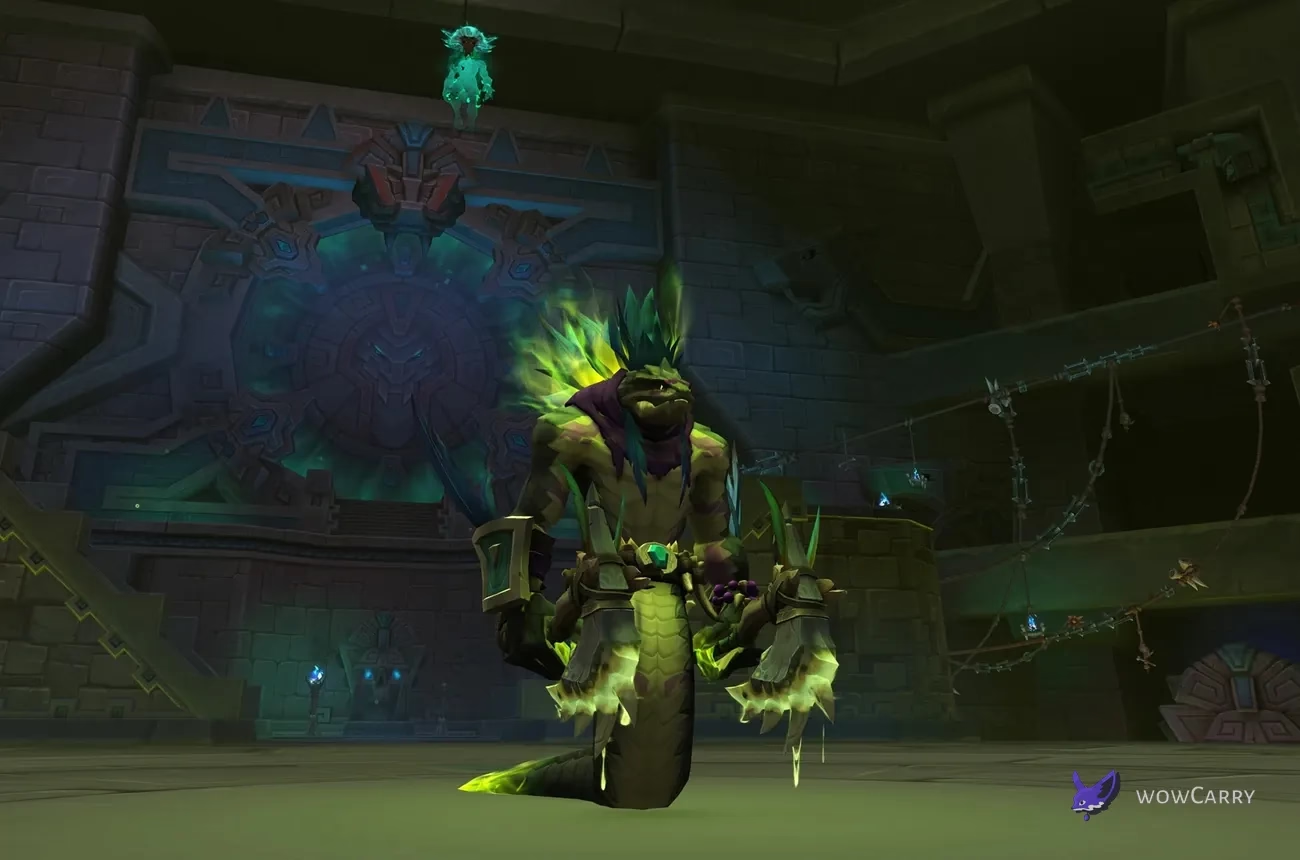
One tank holds Ula'tek while the other holds Gore Rattle. Both aspects share damage through Ula'tek's Bond, so cleave is useful only when it does not compromise egg routes or wave visibility.
Maintain melee coverage
Mother's Wrath knocks the current target back, bites rapidly for three seconds, stacks a long Nature DoT, and slows the tank by 55% for one minute. If the target is out of reach, the effects hit the raid. The boss tank returns immediately after the knockback; the other tank is ready to hold Ula'tek if movement or the slow prevents that return.
Gore Rattle uses Rattler Slam if it has no melee target. Mephitic Thrash hits and knocks back players within 35 yards, while players outside 35 yards still take damage and a ten-second DoT. Distance changes the punishment but does not create a fully safe range.
Read waves and break eggs with Coils
Caustic Waves cross the platform, apply a stacking ten-second DoT to players they hit, and instantly hatch eggs. Watch which wing Ula'tek raises for the first boss-side wave, then check the tail for its follow-up lines. Carriers remain in safe gaps rather than trying to outrun a visible wall.
Call of the Serpent drops more eggs in four-yard impact zones. Move out, assign carriers, then bring enough eligible players into each Spectral Coils impact to reach the 40% minimum and break the carried eggs. On Heroic and Mythic, Soul Constrictor only prevents the prior mitigators from helping with the next impact, so alternate eligible groups.
Use the Heart window correctly
Rage of the Shackled damages the raid every four seconds for 20 seconds and drops seven-yard debris zones. For those same 20 seconds, the Venomous Heart has +200% damage taken, which equals 3x baseline damage. Dodge debris, commit prepared cooldowns to the Heart, and cleave Ula'tek where positioning allows.
Tanks stabilize both aspects while healers cover Rage and the raid avoids debris.
Stage 2: Side Groups, Wardens, and Cauldrons
Move into the preassigned left and right groups. Each side kills its Warden, handles tether breaks, clears small eggs, transports the large egg to its cauldron, and interrupts the resulting weakened add.
Kill the Warden and control gestation
Warden's Protection damages players within seven yards of protected eggs and prevents them from being touched while the Warden lives. Interrupt Malice, follow the add after its relocation, and keep its ground impacts away from the route back to the cauldron.
Writhing Gestation turns nearby eggs into a Blightscale Clutch that hatches after 20 seconds and grows while intact. Swap damage immediately. Grasping Fangs tethers and slows players; move to break the fang, then manage the resulting Blight Vein before another player snaps theirs.
⚠️ Heroic tether warning: three Grasping Fangs targets spawn on each side at every raid size, and each break applies Blight Vein to the entire raid; call first, second, and third instead of breaking on sight.
Normal Blight Vein remains an eight-second personal DoT. Heroic makes each break raid-wide, and Mythic makes the six-second raid-wide effect stack. It is not a dispel, so spacing breaks is the only reliable control.
Deliver the Large Egg
After the Warden dies, collect every small egg first. One player then picks up Doomscale Shell and has 20 seconds to reach the Doomscale Cauldron. The cauldron disrupts gestation before a Ravenous Doomscale uses Dread Roar, which otherwise repeatedly damages and stuns the raid.
The disrupted add receives Defect: Weakened, takes 100% increased damage, and cannot use Dread Roar. Interrupt Anguished Cry and face Desperate Thrash away from the group.
Bring weakened adds to center after both deliveries. Keep side interrupts active, then prepare the second Heart burn.
Intermission: The Shattering
Eggs fall across the platform. Pick them up, move through the sequence of Spectral Coils, and kill each wave of weakened adds. Every impact still uses the 40%-of-raid minimum-damage rule.
On Heroic and Mythic, Soul Constrictor only blocks players who mitigated the preceding Coils from the next impact. Keep the next eligible group near its marker while the previous group clears adds; drifting together can leave both sets out of position.
Necrotic Vapors stacks ambient raid damage as the sequence continues. Healer cooldowns rotate across later soaks instead of all being spent on the first impact.
Stage 3: Bite, Purge, Waves, and Platforms
Ula'tek divides the arena into quadrants. Each cycle produces adds or clutches, marks players with Serpent's Bite, fires Caustic Waves, resolves Volatile Purge, and destroys the current quadrant with Circling Prey.
Kill the Phase 3 adds
Normal and Heroic groups damage clutches until they break, then group Rawlings and Vipers for AoE. A Blightscale Shrieker using Vicious Echoes can damage and stun the raid for six seconds, so focus it before add casts overlap Bite or Purge. Shriekers also use Acidic Expulsion.
On Mythic, slithering clutches move toward venom and must be stopped before contact. Rawlings boil after 25 seconds, and Shriekers boil after 30 seconds. Treat those clocks as hard add-priority checks while the platform continues to shrink.
Remove Serpent's Bite and spread Purge
Bite lasts 15 seconds. Other players enter the seven-yard circle and leech venom until the debuff clears. If it expires, the marked player becomes a Calcified Corpse and takes immunity-piercing lethal damage. Immunity is not a backup plan.
Helpers receive Volatile Purge for five seconds, then separate. On Normal and Heroic, the explosion radius scales with raid size: largest at ten players and progressively smaller to its minimum at 30. Follow the live circle instead of a fixed seven-yard instruction. Mythic Purge also emits Caustic Waves from each helper, so players pre-aim into empty or already-lost space.
✏️ Phase 3 movement: helpers leave the Bite circle the instant it clears, spread into assigned Purge sectors, then move through a confirmed Caustic Wave gap toward the marked next quadrant.
Circling Prey heavily damages and knocks players within 13 yards, still damages players outside that radius, and removes the current platform section. Evacuate the quadrant entirely. If the raid runs out of safe platform, Fury Unleashed is the terminal raid enrage.
Positioning Blueprint
The arena plan should communicate where the raid moves next, not only where it stands now. Keep an egg route through the center, two side markers for Stage 2, and a movable next-quadrant marker for Stage 3.
| Stage | Anchor positions | Movement rule |
|---|---|---|
| Stage 1 | Boss tank at Ula'tek, second tank at tail, Coils groups on indicated impacts, eggs in clear center lanes | Read boss and tail waves before any carrier moves |
| Stage 2 | Balanced left/right groups, one cauldron route per side, center return marker | Kill Warden, clear small eggs, then move large egg |
| Intermission | Alternating Coils groups and central add stack | Eligible group moves first; constrained group clears adds |
| Stage 3 | Three Bite helper sectors, separate Purge lanes, next-quadrant marker | Bite inward, Purge outward, wave gap, full quadrant evacuation |
Keep one marker language across all three stages: center routes for eggs, side markers for Wardens, and outward sectors for the final Purges.

When movement breaks down, protect the next legal egg route or quadrant first; lost damage is recoverable, but another empowered hatch or destroyed safe section is not.
Role Quick Plan
Role calls remain short enough to use during the pull and specific enough to diagnose a wipe.
| Role | Core responsibilities | Priority failure to avoid |
|---|---|---|
| Tanks | Maintain melee on boss and tail, return after knockback, face add cones away, move safely between quadrants | Unchecked Rage or Rattler Slam from an empty melee range |
| Healers | Dispel Poisonous Bite and Acidic Burst, heal Petrifying Sting, cover Coils and staggered Blight Veins | Using every cooldown before late ambient stacks and Purge overlaps |
| Melee DPS | Stay with assigned aspect, break eggs/adds, interrupt Malice and Anguished Cry, help Bite safely | Standing in tank cones or leaving an aspect untanked during movement |
| Ranged DPS | Carry eggs, read waves, switch to clutches, separate Purges, aim Mythic wave lanes | Crossing carriers or hatching an egg with a misplaced wave |
Every side group should know its poison-dispel coverage and interrupt order. Those tools matter more than stacking one damage profile on a side.
Normal Strategy
Normal teaches the complete egg loop. Carry eggs away from venom, break them with assigned Coils, kill weakened Rawlings, keep both boss aspects in melee, and prioritize the Heart during Rage. In Stage 2, kill each Warden, collect small eggs, deliver the Doomscale Egg within 20 seconds, interrupt the weakened add, then regroup.
During The Shattering, move through the Coils sequence and clear adds. In Stage 3, break clutches, assign Bite helpers, spread after the debuff clears, use wave gaps, and leave before Circling Prey destroys the quadrant.
Normal does not add Soul Constrictor, the large-egg chain hatch, or Mythic carrier rules. Groups seeking a scheduled final-boss completion can book a Normal Ula'tek clear; the same egg, Heart, Bite, and platform fundamentals still define the encounter.
Heroic Changes and Progression Plan
Heroic Rawlings gain Poisonous Bite and Vipers gain Petrifying Sting. Soul Constrictor makes players who mitigated one Spectral Coils unable to mitigate only the immediately following impact, so eligible groups alternate. The August 20 hotfix set every Warden to target three Grasping Fangs players per side and reduced Heroic Blight Vein damage. Break those tethers one at a time.
Touching the Doomscale Egg triggers Mass Gestation on every remaining small egg on that side. Kill the Warden, collect all small eggs, confirm the side is clear, then touch the large egg. Normal/Heroic Purge radius is raid-size dependent after the hotfix.
Defeating the boss on Heroic while the seasonal achievement is available awards Ahead of the Curve: Ula'tek. A group targeting that completion can get your Heroic Ula'tek kill; progression assignments still need alternating Coils groups, ordered tether breaks, and small-eggs-first calls.
Mythic Changes and Final-Boss Execution
Mythic replaces ordinary carrying with Hardened eggs, separated Noxious Shell lanes, and carrier rotation after Rancid Yolk. Rawlings boil after 25 seconds and begin Acidic Expulsion. Blight Vein becomes a six-second raid-wide stacking effect, so every tether break waits for the previous danger to fall.
Toxic Womb drops a Blightscale Wretch that awakens after 20 seconds and boils after 30. During Toxic Incubation, four venom impacts travel toward the Wretch. Assigned players intercept them and accept a 12-second stacking DoT; each impact emits waves from its target. An unintercepted impact makes the Wretch deal 15% more damage and take 10% less damage per stack.
Fester Burst damages players farther than ten yards for 12 seconds after its impact, so collapse within ten when other mechanics allow. Stage 2 adds Revenge: the surviving weakened Doomscale gains 100% haste and damage when its clutchmate dies. Synchronize both side kills.
Stage 3 clutches move toward venom, adds retain boil timers, and every Purge emits Caustic Waves. The Mythic kill awards Cutting Edge: Ula'tek while that seasonal achievement remains available. Progression groups can check Mythic Ula'tek availability without changing the encounter's carrier, interception, synced-kill, or platform requirements.
Common Wipes and Recovery Calls
Ula'tek punishes mistakes that persist. An empowered add or a lost platform affects every later cycle, so recovery starts with the next mandatory job rather than chasing boss damage.
| Wipe trigger | Immediate call | Next-pull correction |
|---|---|---|
| Egg touches venom | Focus the Viper and assign Poison dispels | Stop carrier movement before waves |
| Boss or tail loses melee target | Nearest tank closes immediately | Call every tank movement and knockback |
| Coils lacks 40% of raid | Use defensives and stabilize | Call the named eligible group for every impact |
| Heroic Fangs break together | Stop the remaining break and heal | Number all three targets per side |
| Doomscale Egg expires | Prepare for the lethal roar | Clear route, name carrier, start the 20-second call |
| Bite expires | Battle resurrection cannot prevent the immunity-piercing failure | Give every marked player named helpers |
| Purge blocks the route | Move through the remaining safe gap | Assign sectors and Mythic wave directions before Bite |
A recoverable pull has an intact next-quadrant route, controlled add count, and enough eligible players for the next Coils or Bite. Call those three resources first, then decide whether the raid can continue.
Loot, Mount, and Achievements
Ula'tek's loot is item level 302 on Normal, 315 on Heroic, and 344 on Mythic. Notable weapons include Zatha'tek, Breath of Corruption and Jan'thrazet, the Soul Fang.
The encounter also drops Font of Venomous Rage, whose damage was increased by 20% on August 14, Voracious Heart of Ula'tek, and the Slumbering Coil Curio tier token.
Mythic Ula'tek can award the Primeval Skyfriend mount. No Egg Scramble is the encounter achievement. Recheck live loot records before targeting one item because reward tuning can change independently of mechanics.
Frequently Asked Questions
How many players must soak Spectral Coils?
Spectral Coils needs 40% of the current raid to reach minimum damage after the August 20 hotfix. Calculate that number from the actual roster. On Heroic and Mythic, Soul Constrictor only prevents players who mitigated one Coils from mitigating the immediately following Coils; it is not a permanent lockout, so eligible groups alternate.
What happens when a Ula'tek egg touches venom?
The egg immediately hatches a full Blightscale Viper. That Viper applies Putrid Membrane to the entire raid, adding periodic Nature damage for one hour, and uses Acidic Burst. Avoid moving eggs during uncertain wave patterns; breaking an egg safely creates the weaker add instead of the empowered Viper.
Which Ula'tek debuffs can be dispelled?
Poisonous Bite from Heroic and Mythic Rawlings and Acidic Burst from Vipers are Poison effects. Petrifying Sting is not dispellable; heal through its absorb. Blight Vein is also not a dispel and must be handled through staggered Grasping Fangs breaks plus healing, especially when the Mythic version stacks.
Why must small eggs be cleared before the Doomscale Egg?
On Heroic and Mythic, touching the Doomscale Egg triggers Mass Gestation on every remaining small egg on that side. Clear the Warden, collect all small eggs, confirm the route, then pick up the large egg and deliver it to the cauldron within 20 seconds. Reversing that order creates uncontrolled clutches.
How does Serpent's Bite work?
Serpent's Bite lasts 15 seconds and becomes lethal if it expires. Nearby helpers stand within seven yards to leech the venom until the Bite disappears. Those helpers then receive Volatile Purge for five seconds and spread. On Mythic, each Purge also emits Caustic Waves, so helpers need assigned directions.
Does the Venomous Heart take double damage?
No. For 20 seconds during Rage of the Shackled, the Venomous Heart has +200% damage taken, which equals 3x baseline damage. Commit burst cooldowns to the Heart, avoid falling debris, and cleave Ula'tek only when that positioning does not reduce Heart uptime.
What are the hardest Mythic Ula'tek checks?
Mythic demands separated and rotating egg carriers, four Toxic Incubation intercepts, Rawling and Shrieker kills before Boiling Venom, staggered stacking Blight Veins, synchronized weakened Doomscale deaths, and directed Purge waves on shrinking platforms. Any one failure increases add or space pressure for the remaining cycles.
Last reviewed 2026-08-22 against Patch 12.1 live data — Maintained by WowCarry's WoW team.