Strategy at a Glance
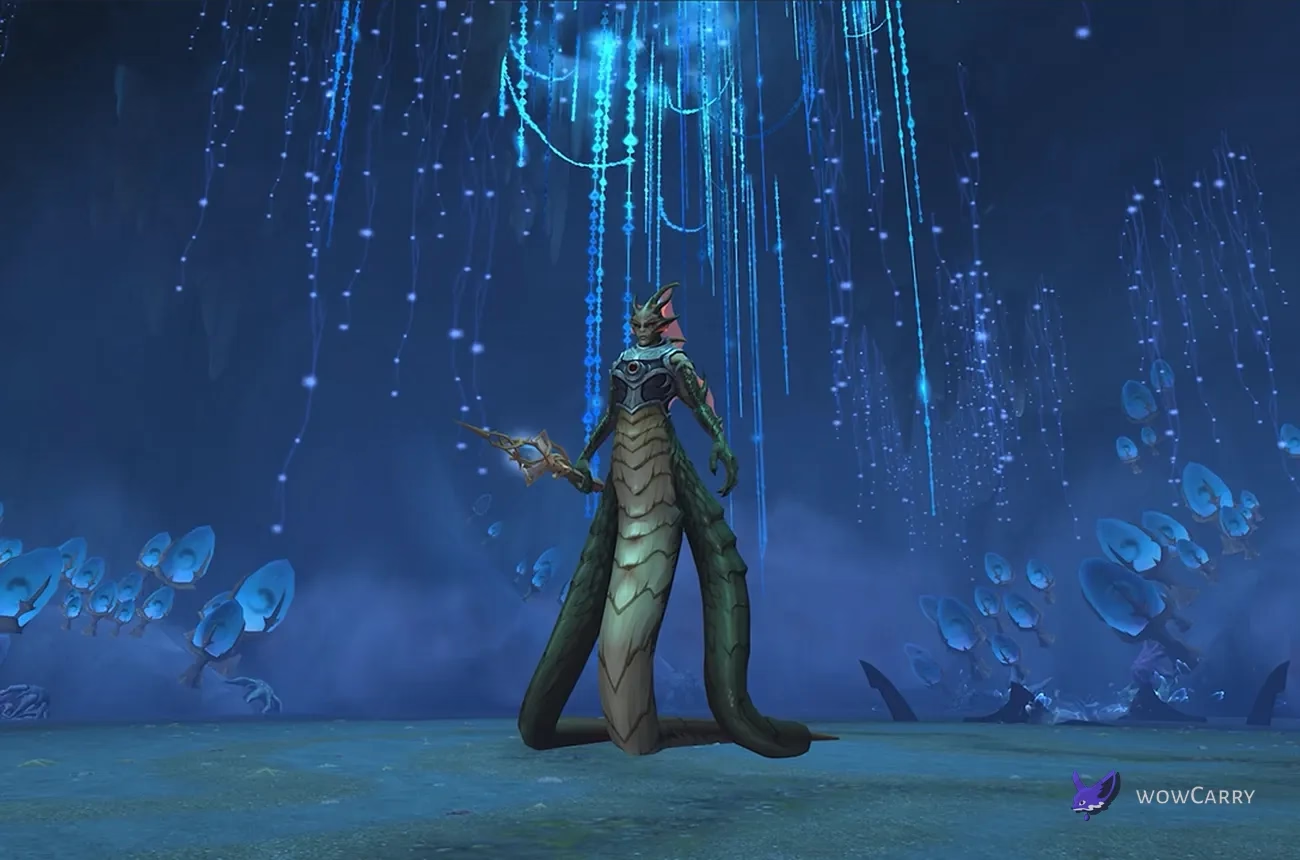
Nek'zali the Soulcoiler opens The Venomous Abyss with a two-stage add-control encounter built around the central Soulcoil Well. Across Patch 12.1 Normal, Heroic, and Mythic, the fight uses a 50% intermission, add priorities, tank lanes, dispel placements, and the permanent raid pressure of Stage Two.
Key Takeaways
- Every Soulcoil Rite gives Nek'zali 5 energy and a stacking raid DoT, so a single add leak damages the raid and shortens the race to the hard enrage.
- Restless Amani and Gravebound Advance require magic damage to break a 25%-health absorb before control and focused damage can stop the add from reaching the well.
- Essence Rend and each Latent Cultist belong at assigned outer markers because removal creates a six-yard impact and a damaging 40% slow zone.
- Possession Barrage needs a long empty tank lane because its raid damage falls as each spectral echo travels farther.
- Heroic adds Ritual Burn plus corpse management through Hungering Pyre and Cremation.
- Mythic adds Grasping Depths and a Drowned Echo, forcing rotating well teams with a named kick order and no repeat entry after leaving the well.
The pull becomes stable when the raid protects one Barrage lane, marks Cultist drops, assigns magic damage to every shield, and treats any path into the well as closed ground.
Quick Pull Plan
Bring two tanks and enough healers to cover repeated raid-wide Shadow damage, delayed dispels, and add-death rot. A common starting point is one healer for every five raiders, with an extra progression healer reasonable on Heroic while stacked add-death rot and Ritual Burn are still overlapping. Mythic fixes the roster at 20 and also needs two or more distinct well teams.
Recommended Raid Setup and Assignments
Set these owners before the ready check; the encounter punishes a late decision more harshly than a conservative assignment.
| Assignment | Owner | Pull rule |
|---|---|---|
| Boss and Barrage | Both tanks | Keep a long empty lane from Nek'zali to the active tank and swap when the active healing-reduction debuff must expire. |
| Amani barriers | Ranged magic damage | Break the absorb immediately, then grip, root, slow, and kill the exposed add before the well. |
| Essence Rend | Healer dispel lead and marked targets | Move to separated edge markers first; remove the Magic effect only after the six-yard spawn area is clear. |
| Intermission | Echo target caller | Kill Echoes in one order, leave transfer blasts, and keep all surviving Amani controlled. |
| Heroic corpses | Pyre soak and flame targets | Place corpses predictably, then aim Cremation within four yards of the intended corpse or add. |
| Mythic well | Two rotating kill teams | Enter on call, interrupt the Drowned Echo cast, kill the add, and never resend an Exhausted player. |
For the full raid route, entrance, boss order, and loot bands, view the complete raid guide. Nek'zali uses a separate well, add, intermission, and tank-lane assignment plan.
Positioning Before the Pull
Start Nek'zali on the outer half of the arena near the first active coffin group. The raid stays behind or beside the boss, the current tank owns a marked outward Barrage lane, and two or more edge sectors remain free for Essence Rend. Never put a Cultist marker between spawning Amani and the well.

Rotate the boss only when it shortens the route to a dense add wave without blocking the tank's escape line. On Heroic and Mythic, place defeated Amani in known corpse sectors so the intermission flame targets can reach them. Mythic well-team markers should not overlap those corpse sectors or the Echo kill route.
Damage and Healing Cooldowns
Use Bloodlust as Stage Two begins. There is no separate boss damage amp, but Uncoiling then hits the raid every 0.9 seconds until the boss dies, so shortening that stage protects healer mana and reduces the number of scheduled Rite and add overlaps.
Map major raid cooldowns to Soulcoil Ignition, the intermission's planned Rite pressure, and the first dangerous Stage-Two overlap. Keep a recovery cooldown unassigned for an accidental leak; a Restless Amani that reaches the well adds both immediate damage and a 44-second stacking DoT.
✏️ Soulcoil Ignition technique: spread before the channel so five-yard Anguished Echo impacts cannot chain-knock players into the well, then stabilize each one-second Rite pulse without collapsing through another marker.
Tanks reserve mitigation for the stacking tank debuff and the Barrage run rather than ordinary melee swings. Mythic downstairs players pre-plan personals and externals for Immortal Coil, while upstairs healers retain enough throughput to cover the raid-wide pull and damage.
Fight Overview and Timeline
Stage One lasts to 50% boss health. The intermission ends only after the Echoes of Jawae lose their Tethers, and Stage Two continues until Nek'zali dies or reaches 100 energy. Call the fight from those health and energy triggers instead of tying assignments to a fixed wall-clock timestamp.
Stage One: Soulcoiler Initiation
Nek'zali repeats Essence Rend, add waves, Possession Barrage, the tank debuff, and scripted Soulcoil Ignition. Rend targets establish the future Cultist layout. Magic damage breaks every Amani barrier, then the raid uses control and focused damage to prevent a Rite. The active tank runs outward for Barrage while the raid stays completely outside its path.
Each add death also triggers Corpse Blight, which hits every player and leaves a stacking 15-second Plague DoT ticking every second. Kill urgent adds before they leak, but stagger deaths when control permits. Simultaneous deaths turn an otherwise clean add wave into a healer failure.
Intermission: Ritual of Awakening
At 50%, Nek'zali retreats and becomes immune. Echoes of Jawae maintain Tether of Awakening; defeating each Echo severs its protection. During Soul Transfer, leave the telegraphed blast before the 15-second channel finishes while add controllers continue protecting the well.
On Heroic and Mythic, defeated Amani leave a Vessel of Awakening that can be repossessed. Hungering Pyre splits Fire damage among players within ten yards and sends Slithering Flame toward non-soakers. On expiry, Cremation destroys corpses and Amani within four yards. The flame target, not the soak group, owns the final corpse placement.
Stage Two: Uncoiling
Stage Two retains Rend, Barrage, the tank debuff, Cultists, add control, and Soulcoil Rite while Uncoiling creates a permanent healing race. Invoke triggers a Rite and makes Cultists reposition through Entwined Step. Clean Stage-One drop sectors therefore matter after the intermission; a careless early zone can cross the raid during the burn.
On Mythic, Invoke also interrupts active casts and silences affected casters for three seconds. Call a stop-cast before completion. The raid does not kick Nek'zali; every player finishes or cancels the current cast, then resumes immediately after the event.
Mechanics and How to Handle Them
The encounter combines an energy hard enrage, add travel, positional dispels, tank-distance scaling, and stage-specific control. The priority is always the mechanic that prevents the next Rite, not damage-meter padding on the boss.
Soulcoil Well, Rites, and Amani
Standing in the well deals Shadow damage every second, and a player who dies inside becomes Soulcoiled and is compelled toward sacrifice. Every Amani that reaches the well activates a Rite for 5 boss energy, an immediate raid hit, and a stacking DoT ticking every two seconds for 44 seconds. At 100 energy, Uncoiled Rage gives Nek'zali 150% attack and movement speed, 500% damage, and taunt immunity.
Gravebound Advance is a magic absorb equal to 25% of the add's maximum health. While it holds, the Amani cannot die and fixates on the well. Assign ranged magic burst before ordinary add damage; after the shield falls, grips, roots, slows, and the off-tank buy the kill time.
⚠️ Common Amani error: spending physical burst into Gravebound Advance while saving magic cooldowns for the boss leaves an unkillable add moving toward a Rite, which reverses the correct damage priority.
Call each barrier break and each death. The raid must distinguish an add still shielded, an exposed add ready for control, and a corpse that will matter during the Heroic intermission.
Essence Rend and Possession Barrage
Essence Rend pulls targets for five seconds, knocks them away, then leaves a ghostly effect for 15 seconds. Removing the Magic debuff creates a Cultist at that player's position, damages anyone within six yards, and leaves a zone that ticks every second and slows by 40%. A quick dispel in the group solves the debuff by breaking the room.
Possession Barrage sends spectral echoes toward the primary target. Its raid damage falls with travel distance, so the tank moves to the outer marker and everyone else clears the line. Nobody intercepts an echo near the boss, and no Rend target crosses the lane until the final impact resolves.
Tank Swaps, Dispels, Interrupts, and Control
Hollowing Strikes adds a Shadow DoT and reduces healing and absorption received by 5% per stack for 15 seconds. Swap so the inactive tank's debuff fully expires, using a duration-based handoff rather than a universal stack count.
Essence Rend is the baseline Magic dispel, but its removal location is part of the assignment. No dispel removes Ritual Burn, Corpse Blight, Slithering Flame, the Mythic well-exit debuff, or Hollowing Strikes. On Mythic, Soulcoiler's Curse is the required interrupt; the Drowned Echo ejects and Soulcoils the entire well team if the cast completes.
Once an Amani barrier is broken, ordinary control is valuable. During the intermission, use displacement to hold adds inside a planned Cremation radius, but never drag them across an Echo blast, the well-team entry, or the Barrage line.
Tank, Healer, Melee, and Ranged Responsibilities
Each role has one primary failure to prevent: tanks protect the Barrage lane, healers control removals and raid spikes, melee keep add and corpse routes clear, and ranged break barriers before travel becomes dangerous.
Tanks
Keep Nek'zali away from the well and face her so the active tank can run down the marked Barrage lane. Swap on Hollowing Strikes when the other tank can let its 15-second healing reduction expire. The free tank collects exposed Amani and moves them away from the well; a still-shielded add remains fixated and cannot be solved by taunt alone.
Healers
Delay Rend dispels until targets reach separated edge markers. Cover Ignition, track 15-second Corpse Blight stacks, and expect heavier Rite damage while Ritual Burn remains on Heroic or Mythic. During the intermission, heal the Pyre group and the eight-second Slithering Flame targets. Mythic healers split coverage between the upstairs raid and the Drowned Echo team.
Melee DPS
Stay out of the tank's outward line and switch immediately to exposed Amani or Echoes. Help control adds after the magic barrier breaks, but avoid standing where a Rend removal creates its Cultist. On Heroic and Mythic, keep corpse sectors visible and leave the four-yard Cremation point before the flame expires.
Ranged DPS
Own the first magic damage into every Gravebound Advance and keep casts moving while adds travel. Use grips, roots, or slows only after the shield is gone. Place Rend at the correct outer marker rather than wherever a cast finishes. Mythic casters join their fixed well or upstairs assignment and stop casting before every Stage-Two Invoke.
Clear ownership keeps the same mechanic from receiving four conflicting calls. The tank names the Barrage lane, one healer owns dispels, one player calls add barriers, and one Mythic leader releases each well team.
Difficulty Comparison
Normal establishes the entire Well/Rite energy loop. Heroic changes corpse planning and increases the cost of every Rite, while Mythic adds a separate encounter inside the well and a Stage-Two casting restriction.
| Difficulty | Added rule | Raid adjustment |
|---|---|---|
| Normal | Baseline Amani, Rend, Barrage, 50% intermission, Rites, and Uncoiling. | Protect the well, break shields, use edge dispels, and keep boss health moving without losing add control. |
| Heroic | Ritual Burn lasts one minute; Vessels, Pyre, Slithering Flame, and Cremation add corpse management. | Place corpses in sectors, fix a Pyre group, and give non-soakers individual four-yard Cremation targets. |
| Mythic | Grasping Depths, Drowned Echo, the well-exit vulnerability, and the three-second Invoke silence rider. | Rotate distinct well teams with kicks and call a raid-wide stop-cast during Stage Two. |
Learn the baseline route first, then add only the assignment introduced by the selected difficulty.
Normal Strategy
Break each Amani barrier with magic damage and finish the add before it reaches center. Rend targets use edge markers; healers dispel after they are clear. Tanks keep a long Barrage lane and trade Nek'zali as Hollowing Strikes demands. At 50%, kill Echoes in order while avoiding Soul Transfer, then use Bloodlust when Stage Two begins.
During the burn, stop new leaks even if it costs boss uptime. Invoke adds a scheduled Rite and moves Cultists, while Uncoiling never stops. A clean Normal kill is built on low boss energy and usable floor space entering Stage Two.
Heroic Changes
Every Rite now applies 15% increased Rite damage taken for one minute, stacking. An accidental Amani leak can therefore amplify later scripted Rites long after the add is dead. Healers should not spend the final cooldown before confirming current Ritual Burn stacks.
Amani corpses persist as Vessels. During the intermission, a called group shares Hungering Pyre within ten yards, while non-soakers receive Slithering Flame. Aim each expiry within four yards of a chosen corpse or living Amani, then leave the point before Cremation. It is Cremation, not the Pyre hit itself, that performs the incineration.
Mythic Changes
Grasping Depths awakens a Drowned Echo in the well, pulls the raid, and deals damage every second until the Echo dies. Assigned players enter while it lives, dodge Swirling Spirits, and interrupt Soulcoiler's Curse. Leaving applies Soul Exhaustion, increasing later Well and Immortal Coil damage by 300%, so that team cannot handle the next event.
Use at least two distinct teams with separate kick orders during the intermission. Upstairs players counter the pull without drifting into the well, continue add control, and keep the boss lane usable while the assigned team kills the Drowned Echo.
📌 Mythic well call: say “team in, kick one, kick two, exit” and immediately name the next team; a vague “go downstairs” call encourages an Exhausted player to re-enter and take 300% increased damage.
In Stage Two, call “stop” before Invoke. Anyone caught mid-cast is interrupted and silenced for three seconds, which can remove crucial healing during Uncoiling. Resume casts only after the event has completed.
Common Wipe Causes and Recovery Calls
Diagnose the first Rite or floor-space failure rather than the final death. Most late wipes begin with an earlier add leak, central Cultist, or poorly placed corpse.
| Failure | Immediate response | Next-pull correction |
|---|---|---|
| Amani reaches the well | Use a raid cooldown for the Rite and finish every remaining add. | Assign earlier magic barrier damage and save control for the exposed state. |
| Rend is dispelled in the raid | Move the group away from the new Cultist zone and preserve the Barrage lane. | Require the target to reach its numbered edge marker before the dispel call. |
| Barrage is intercepted | Use personals for the stronger raid hit and clear the next lane early. | Ban all cross-traffic from the boss-to-tank path until the final echo lands. |
| Corpse Blight overlaps | Stabilize current stacks and control the next low-health add briefly. | Stagger deaths without allowing an exposed Amani to approach center. |
| Heroic Vessels reawaken | Grip the add away from the well and aim the next Cremation into it. | Place corpses together in reachable sectors without stacking flame targets. |
| Mythic Curse completes | Recover only if the ejected team avoids sacrifice; otherwise reset quickly. | Give each Drowned Echo two named kicks plus a backup. |
Keep the recovery call mechanical: identify the leaked add, blocked lane, bad removal, or missed kick, then retain every assignment that resolved correctly.
💡 Progression diagnosis: high energy signals Amani control, crowded Stage Two signals Essence Rend placement, and a sudden Mythic Rite cascade signals Soulcoiler's Curse or an exhausted team returning too early.
A roster that has isolated its recurring failure to this encounter can book a single-boss clear after reviewing the failed assignment and current difficulty.
Loot and Hotfix Notes
Nek'zali drops item level 292 Champion 1/6 gear on Normal, 305 Hero 1/6 gear on Heroic, and 318 Myth 1/6 gear on Mythic. No class-set token is assigned to this encounter.
| Drop | Type | Current note |
|---|---|---|
| Soulcoiler Ritual Vessel | Healer trinket | Its absorb was reduced by 15% in the August 14 item pass. |
| Strongblood's Ceremonial Cleaver | One-hand axe | Weapon drop from Nek'zali. |
| Hexing Spiritrender | One-hand dagger | Weapon drop from Nek'zali. |
| Tomb-Creeper's Claw | Fist weapon | Weapon drop from Nek'zali. |
Blizzard's live hotfix ledger records an August 19 fix for Nek'zali failing to leash near the entrance. The August 20 entries add no further encounter-specific tuning.
FAQ
When Should You Use Bloodlust on Nek'zali?
Use Bloodlust as Stage Two begins. Uncoiling then damages the raid every 0.9 seconds until Nek'zali dies, while Invoke, Amani, Essence Rend, Hollowing Strikes, and Possession Barrage remain active. Nek'zali has no separate vulnerability window, so the value comes from shortening the permanent healing race. Keep add priority intact even during the burn.
How Do You Stop Restless Amani from Reaching the Soulcoil Well?
Break Gravebound Advance with magic damage first; the barrier equals 25% of the add's maximum health, prevents its destruction, and fixes it on the well. Once the shield falls, use damage, grips, roots, slows, and the off-tank. If an Amani reaches the Soulcoil Well, it triggers a Rite, gives Nek'zali 5 energy, and adds a stacking 44-second raid DoT.
When Should Healers Dispel Essence Rend?
Wait until each Essence Rend target reaches a separated outer marker. Removing the Magic effect creates a Latent Cultist at that exact position, damages players within six yards, and leaves a zone that slows by 40%. Natural expiry produces the same Cultist. A fast dispel in the group is harmful because it blocks add paths and the Possession Barrage lane.
What Changes on Heroic Nek'zali?
Heroic makes every Soulcoil Rite apply Ritual Burn, increasing later Rite damage by 15% for one minute per stack. Defeated Amani also leave Vessels of Awakening. During the intermission, Hungering Pyre marks the group-soak event and Slithering Flame targets non-soakers; its Cremation expiry incinerates corpses or Amani within four yards.
How Does the Drowned Echo Work on Mythic?
Grasping Depths awakens the Drowned Echo inside the well, pulls players, and damages the raid every second. A fixed team enters, dodges Swirling Spirits, interrupts Soulcoiler's Curse, and kills the Echo. Leaving applies Soul Exhaustion, increasing later Well and Immortal Coil damage by 300%, so the next event needs a different team with its own kick order.
What Happens If Nek'zali Reaches 100 Energy?
Uncoiled Rage increases Nek'zali's attack and movement speed by 150%, increases all damage by 500%, and makes her immune to taunts. Treat it as the hard enrage. Prevent it by stopping Amani leaks and controlling every scripted Rite rather than planning to survive the buff. On Heroic and Mythic, Ritual Burn makes the approach to 100 energy even less recoverable.
Last reviewed 2026-08-22 against Patch 12.1 live data — Maintained by WowCarry's WoW team.